Make a website. From Scratch! PART 1
Posted on March 16, 2025 • 6 min read • 1,069 wordsWe will be using Amazon AWS S3 for hosting and Amazon AWS Route 53 for the domain.
Oh, hi…I didn’t see you there! You might know me from other tech posts such as “Failure to reboot, living in the Mothership’s basement.” and “Help, I ate my motherboard!”
Well today, I will be showing how you too can create a website from scratch! That means buying the site name (domain name) and using the big bad CLOUD to put your website on (also called hosting! as in, hosting in the cloud).
For the cloud stuff we are going to go with Amazon AWS simply because there are more how-to articles and I am quite lazy. Other choices could be Google or Microsoft. Wow, so many big company names.
Now keep in mind that signing up for AWS is FREE but hosting will be costing! When all is said and done you are looking at ~$5 a month to keep your site running. Of course you can go with other places that do most of what we are going to be doing for you…buuuuut, the costs are much higher. Like ~$20, or something. That’s like, 3 whole baggels worth!
Okay, enough non-witty banter between me and myself. Let’s get started!
If you haven’t bought your website name (also called a domain) go here first!
www.pizzozz.com/making-a-website/connectingdomain/
If you have bought your domain somewhere else, well, then ask ChatGPT how to switch it to AWS. I mean, let’s be honest, that’s basically what I’m doing.
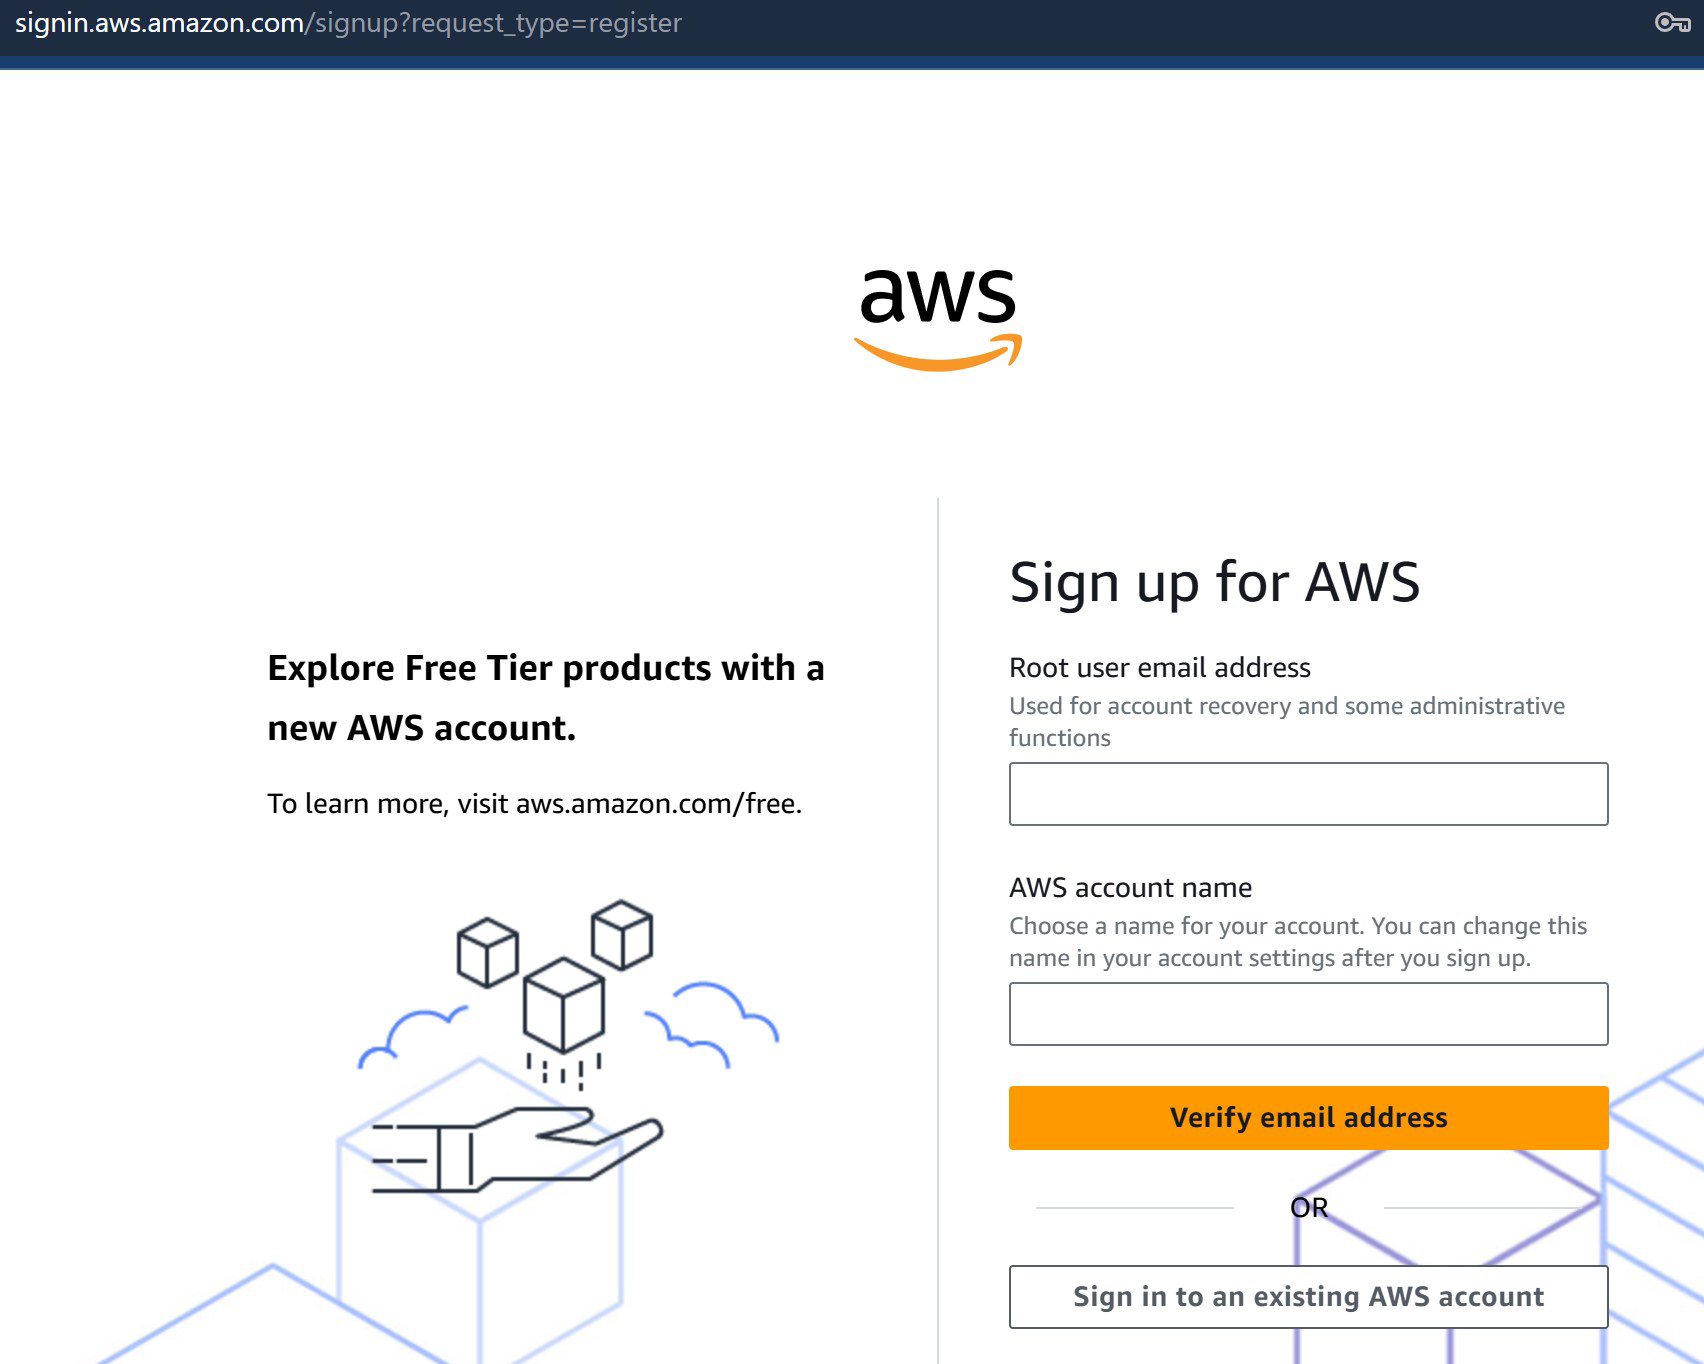
First we sign up for AWS and log in!
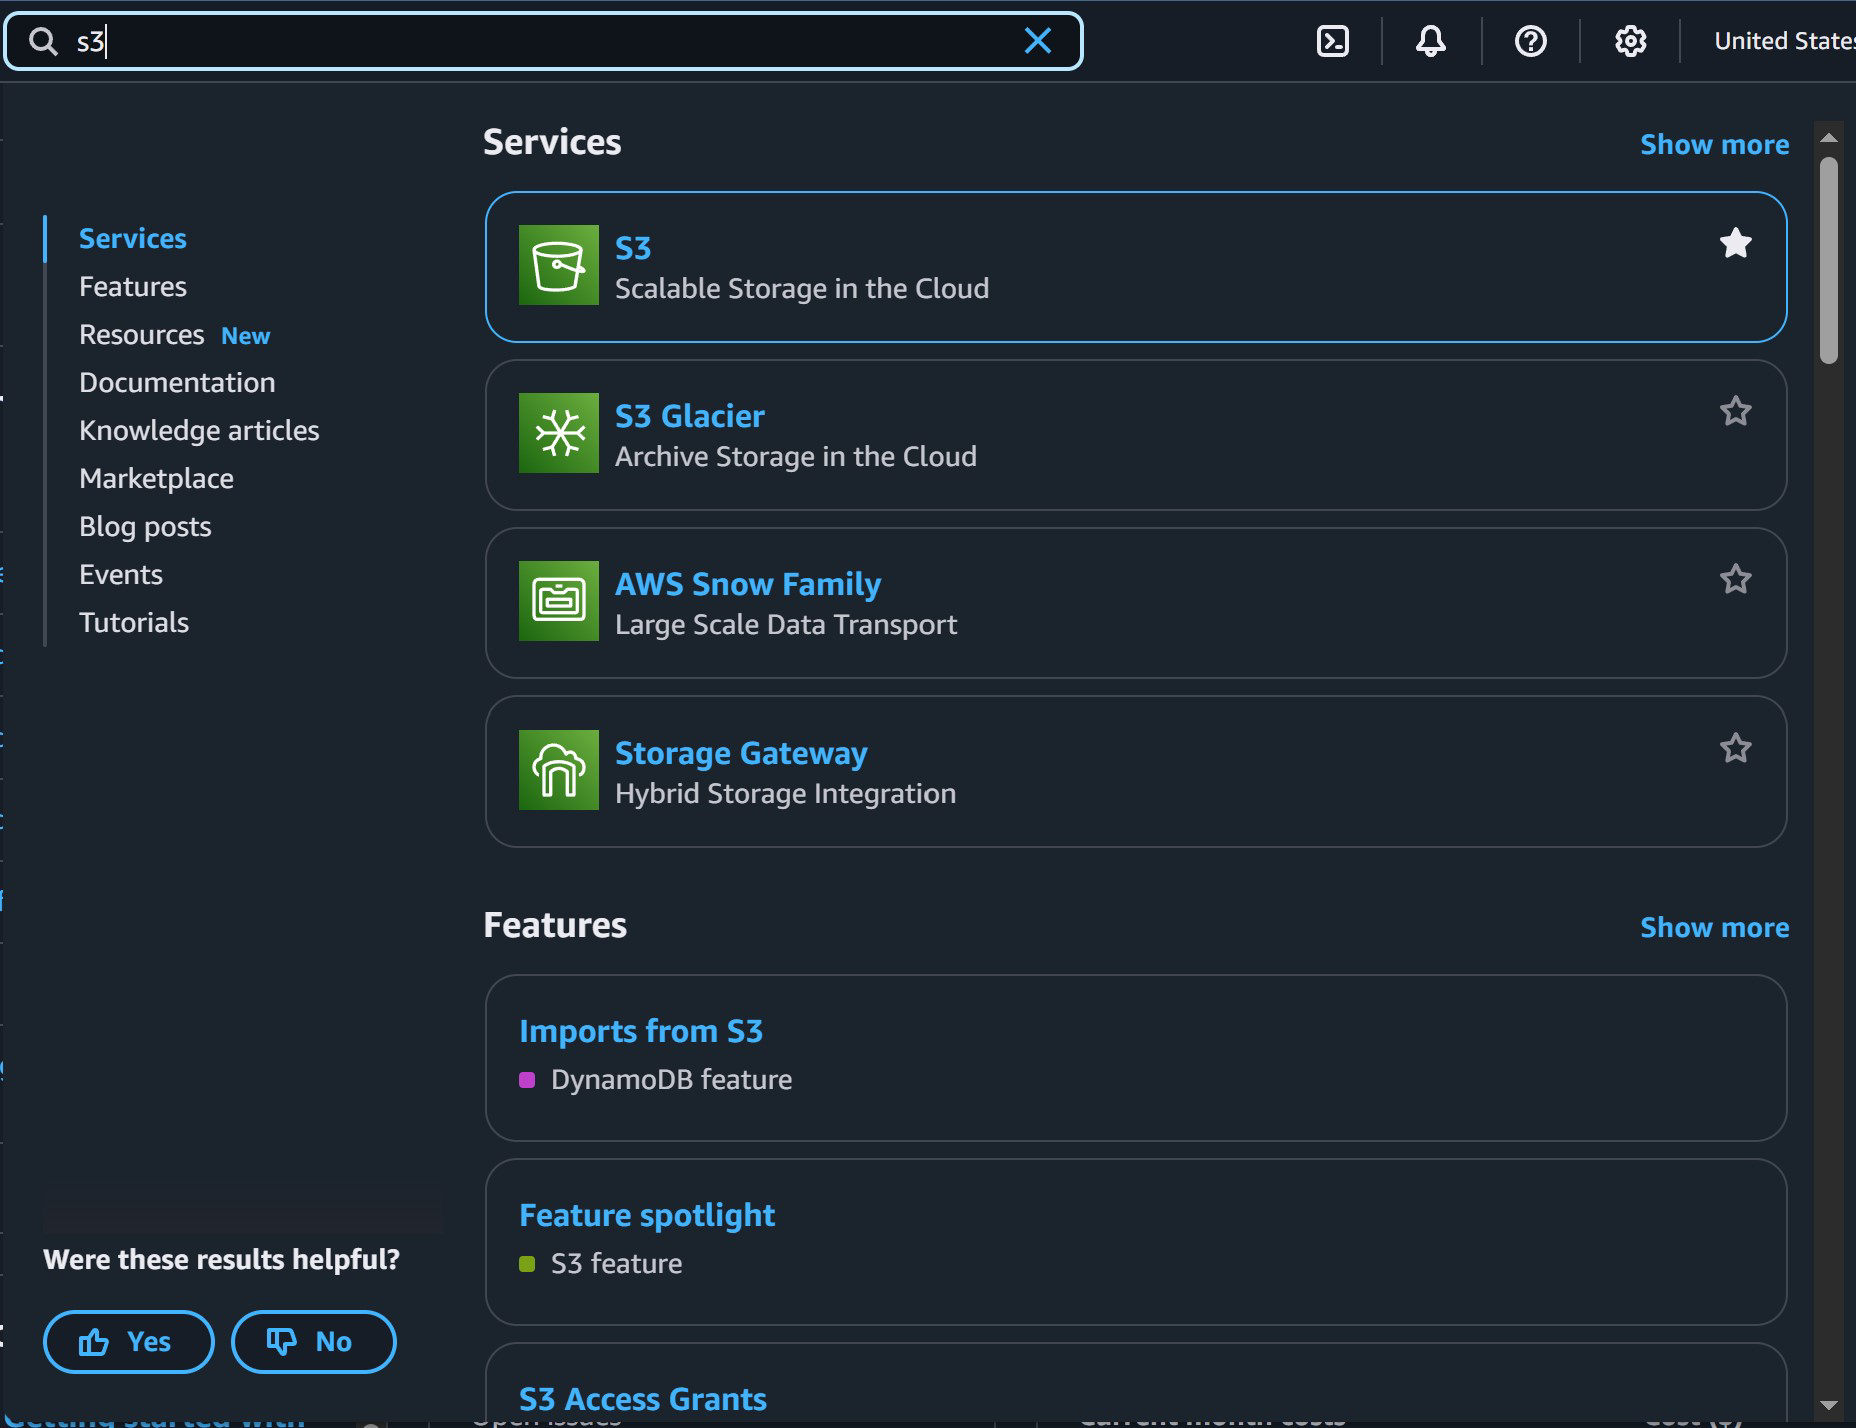
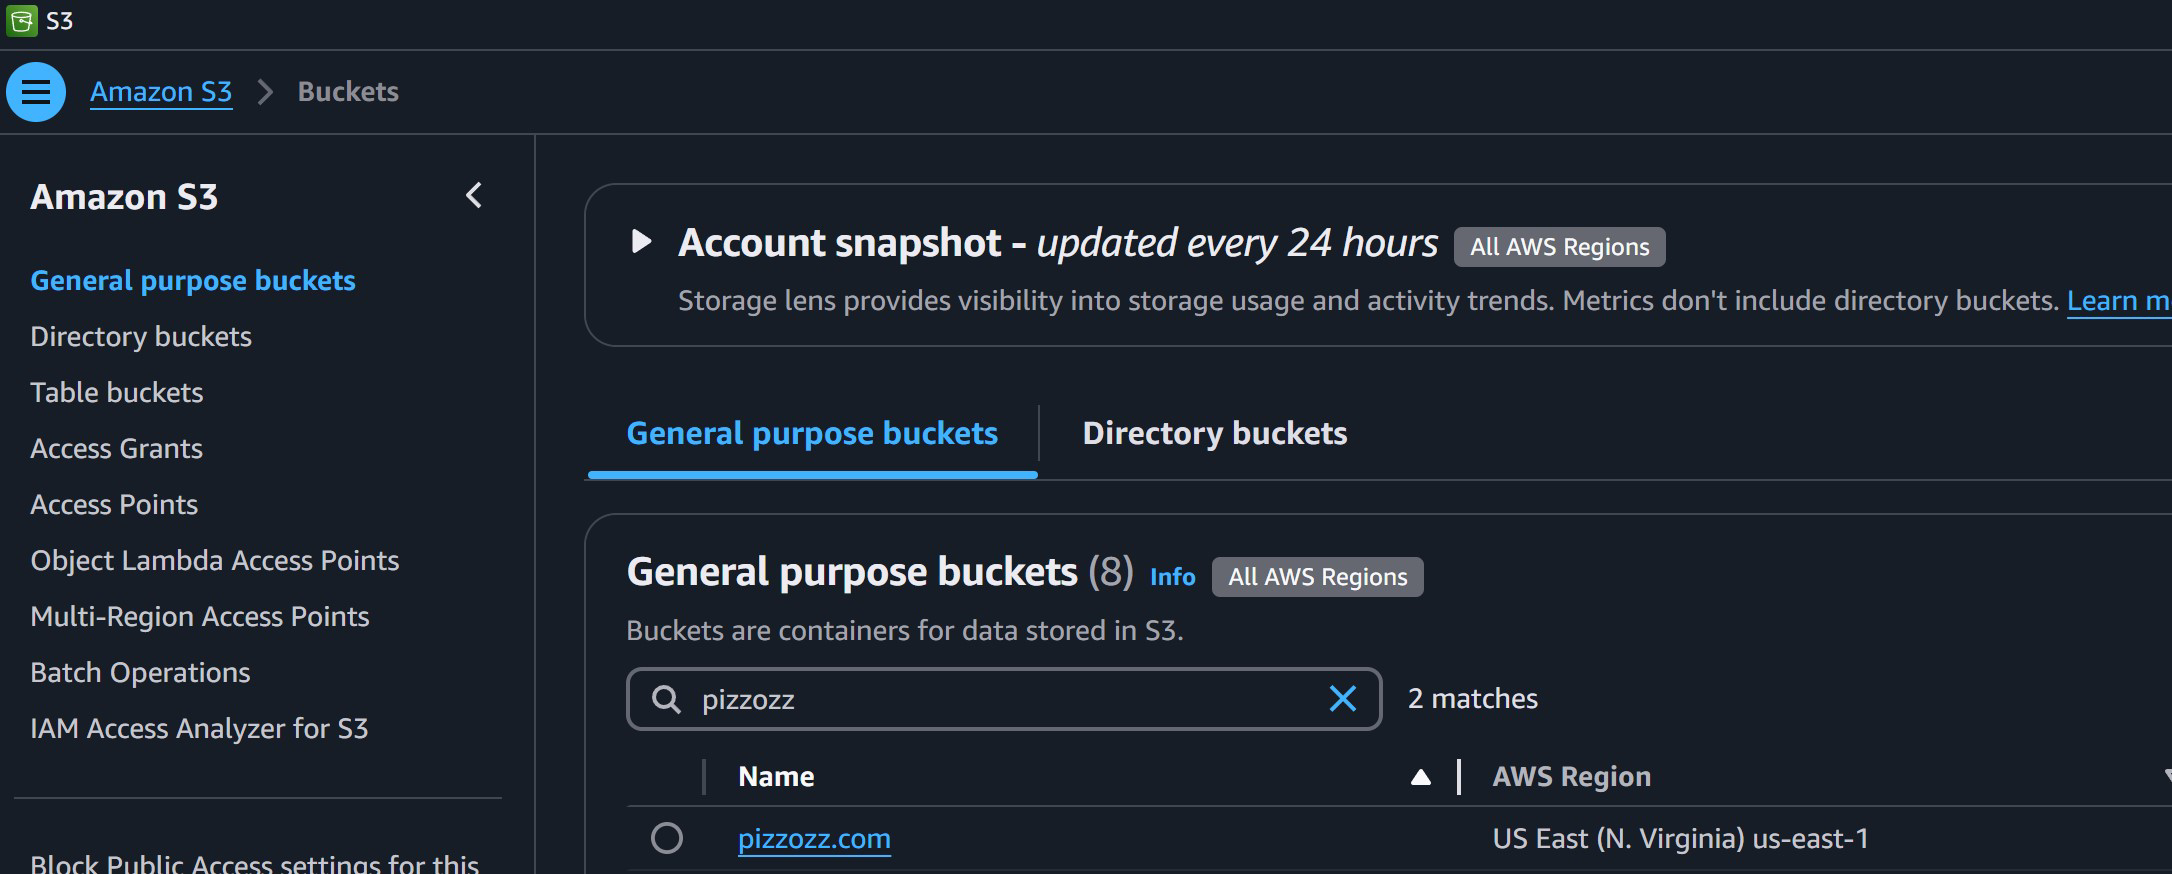
After we log in we want to search for S3 in the top bar and click on that green S3 bucket.
S3 is like, the imgur of the internet. All websites store their stuff there. The good, the bad, and the ugly. Imgur stores their imagurs on there! If something were to happen to S3 the whole internet would break, basically. But it’s very safe, don’t worry. We’re gonna put all our stuff there.
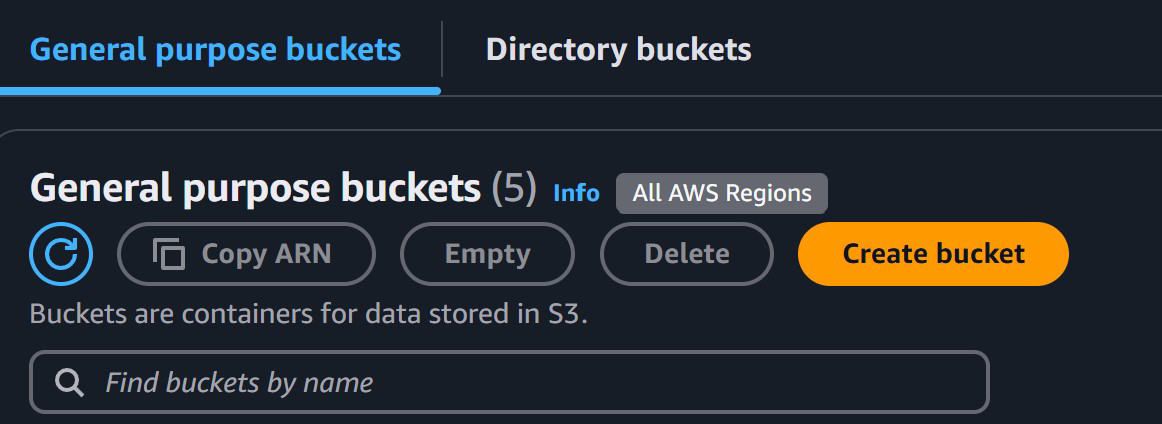
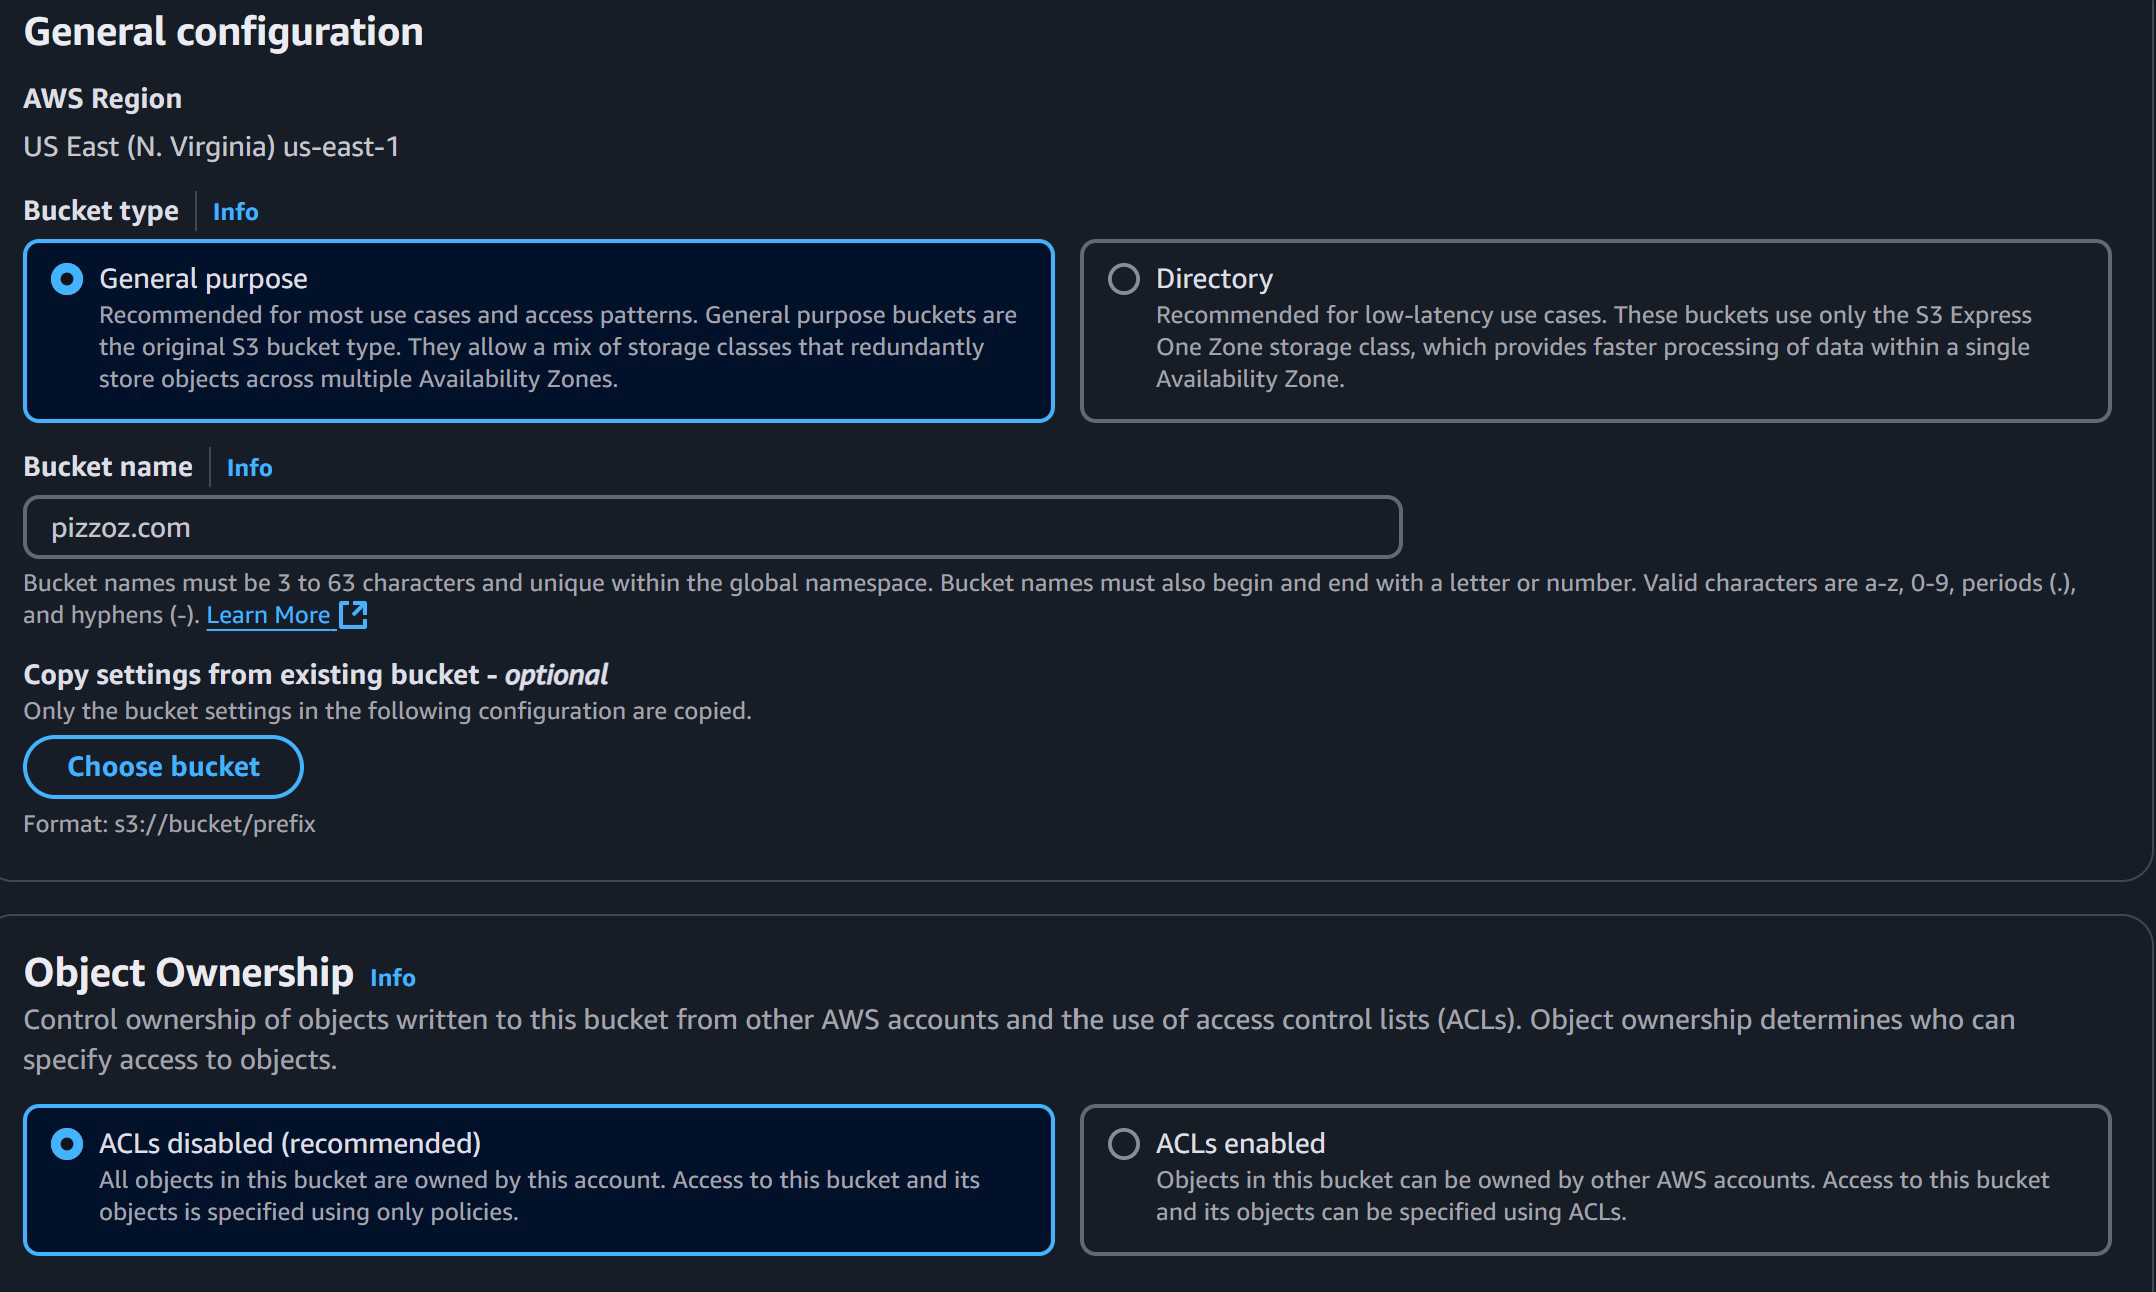
Now we are at the S3 bucket console, we want to create a new bucket. So click “Create bucket”
A bucket is just an AWS name that means like, a folder, or maybe like a directory, or you know…a bucket to hold stuff.
Now for the next few parts just copy all the settings as they look on my end. For the very next step “Bucket Name” should be the name of your website, in my case it’s pizzozz.com.
Note: NOT
www.pizzozz.com! We will take care of that later.
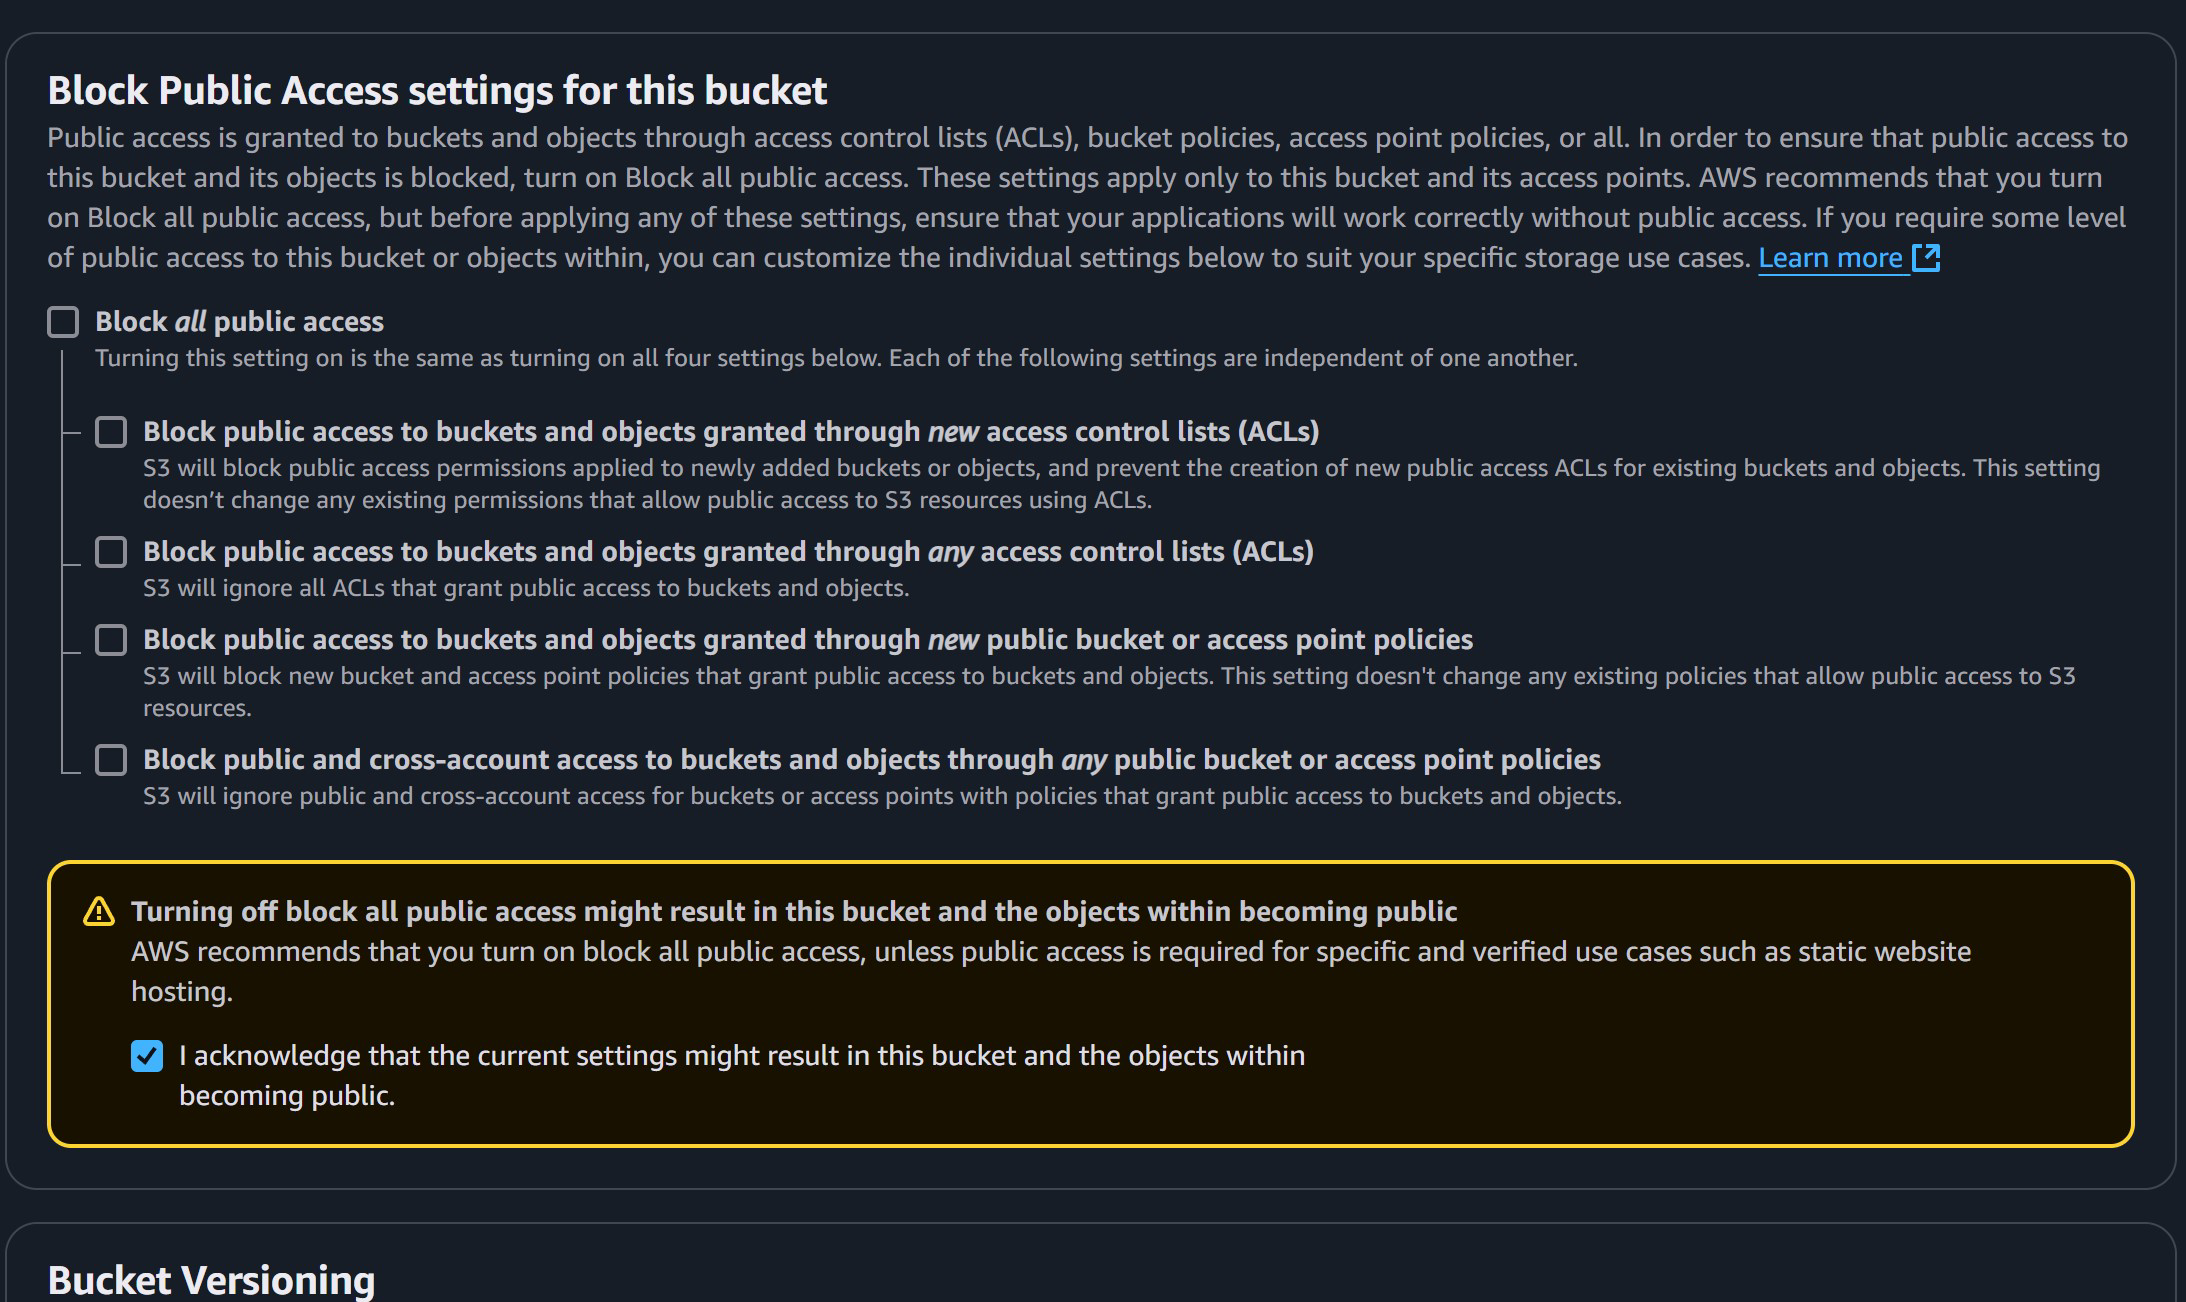
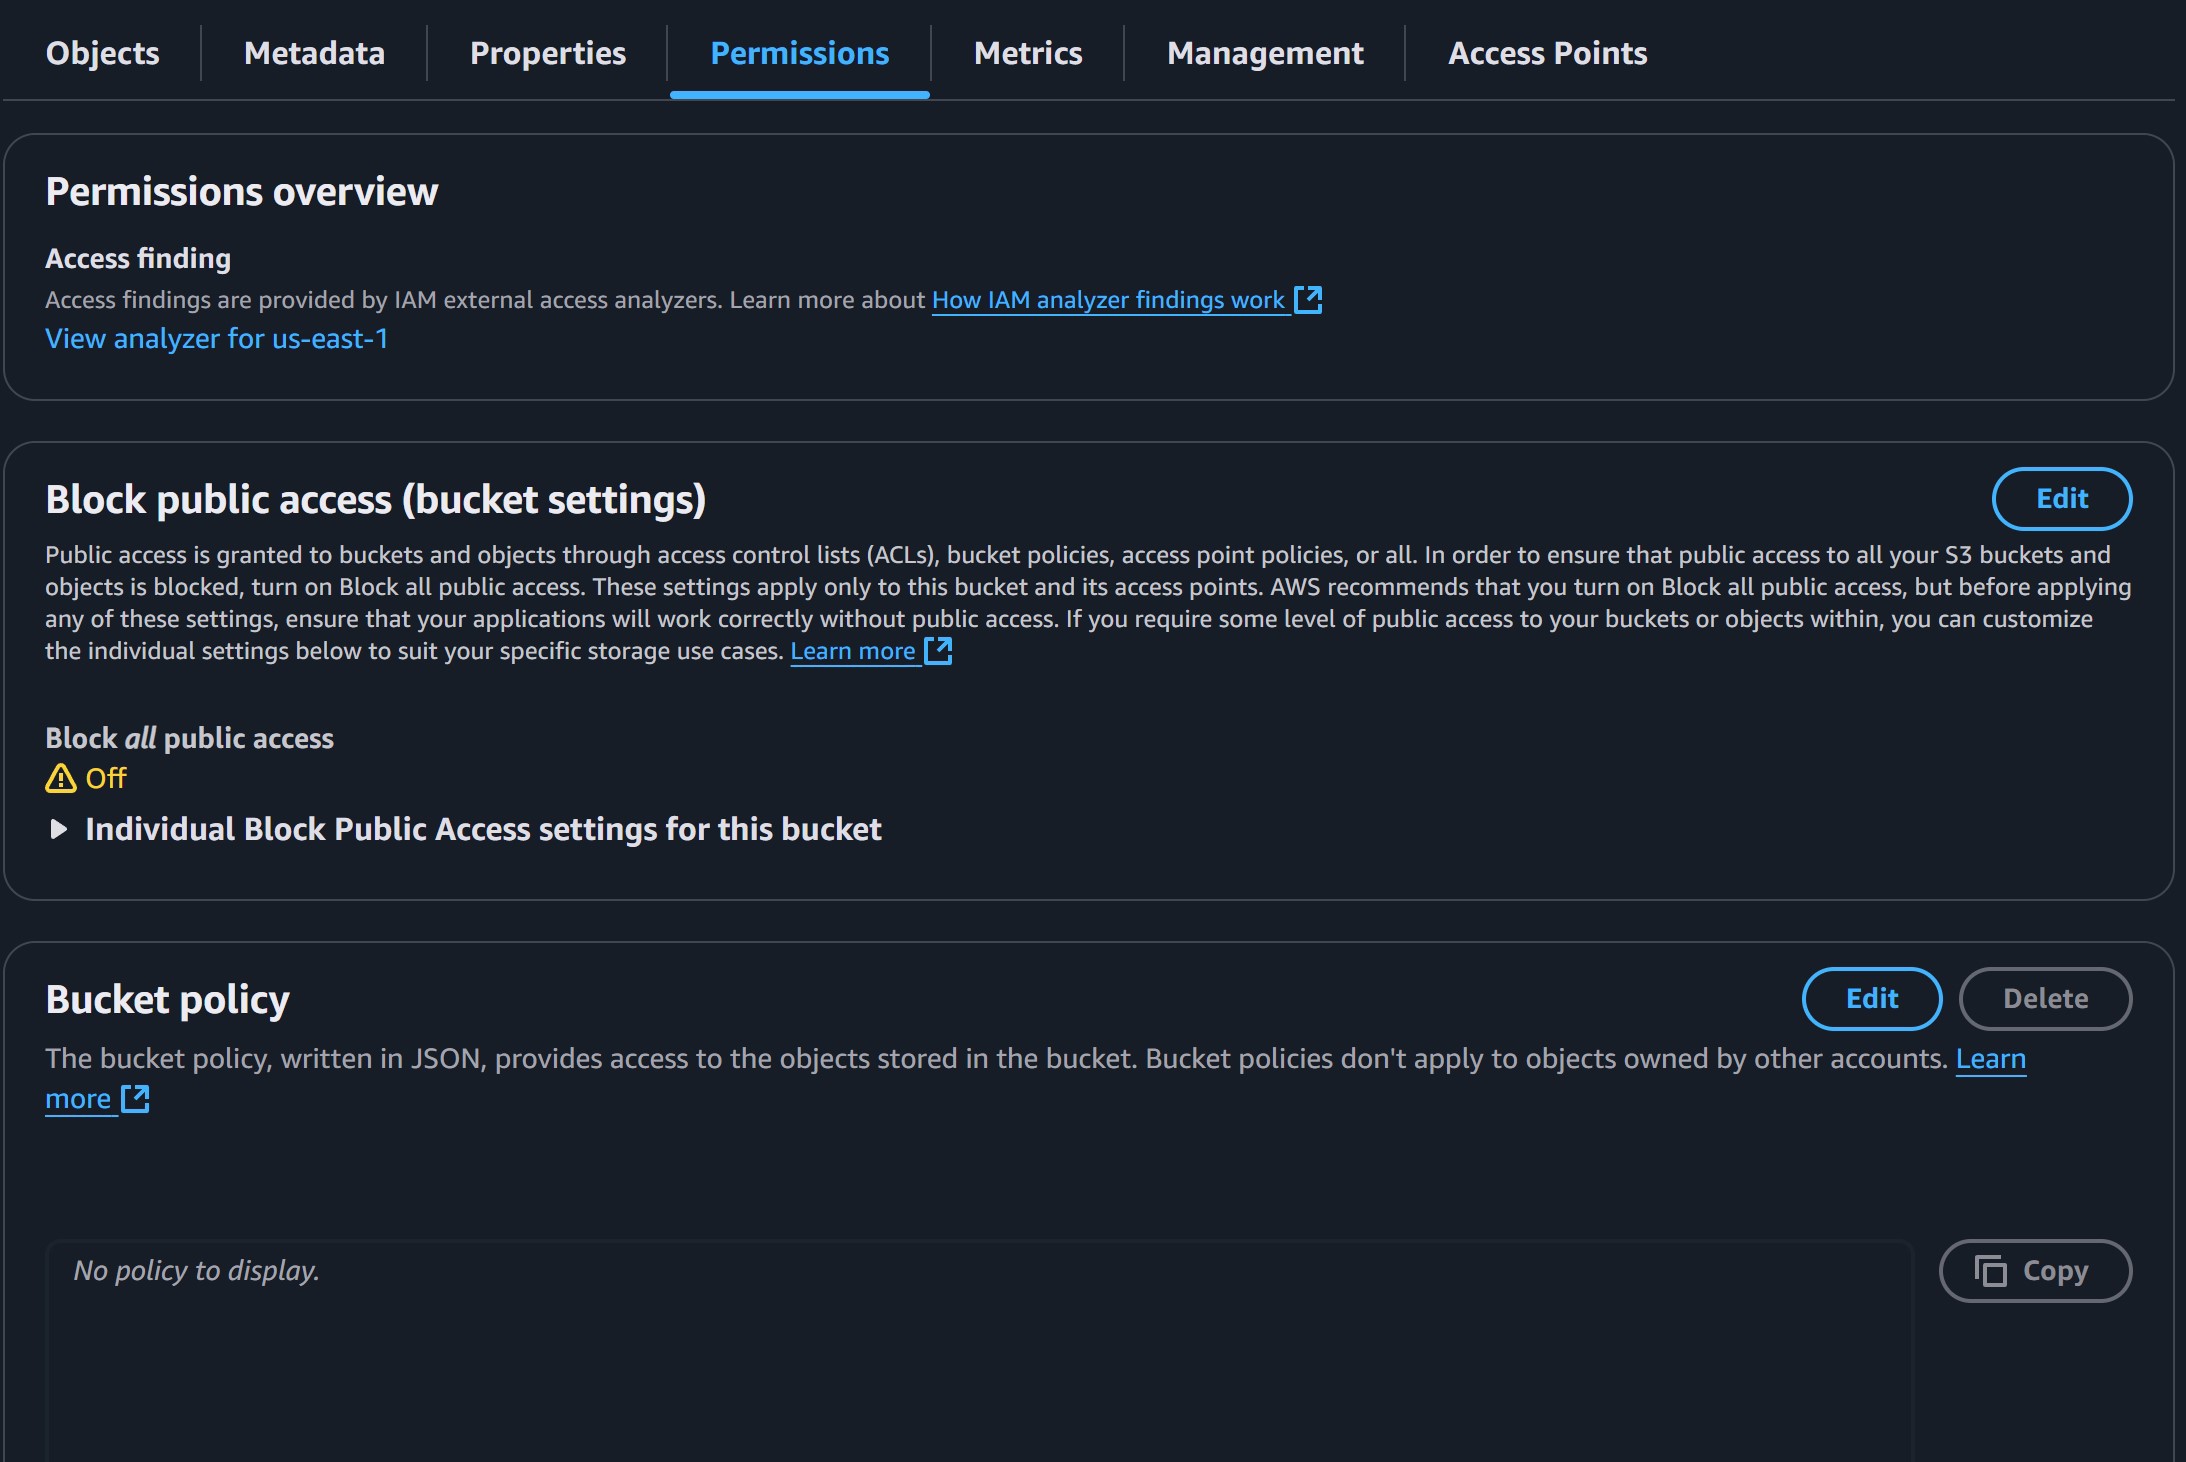
For this part we want to UNCHECK “Block all public access” and uncheck everything under there as well.
AWS checks this for you by default so people don’t see your bucket-stuff but we are creating a website so we want people to look at our goods.
Funny story: A lot of big-name companies have gotten “hacked” because their coders accidently forgot to block access to buckets that had like, credit cards, address and all those personal goodies. Whoops! That’s why AWS now checks it by default.
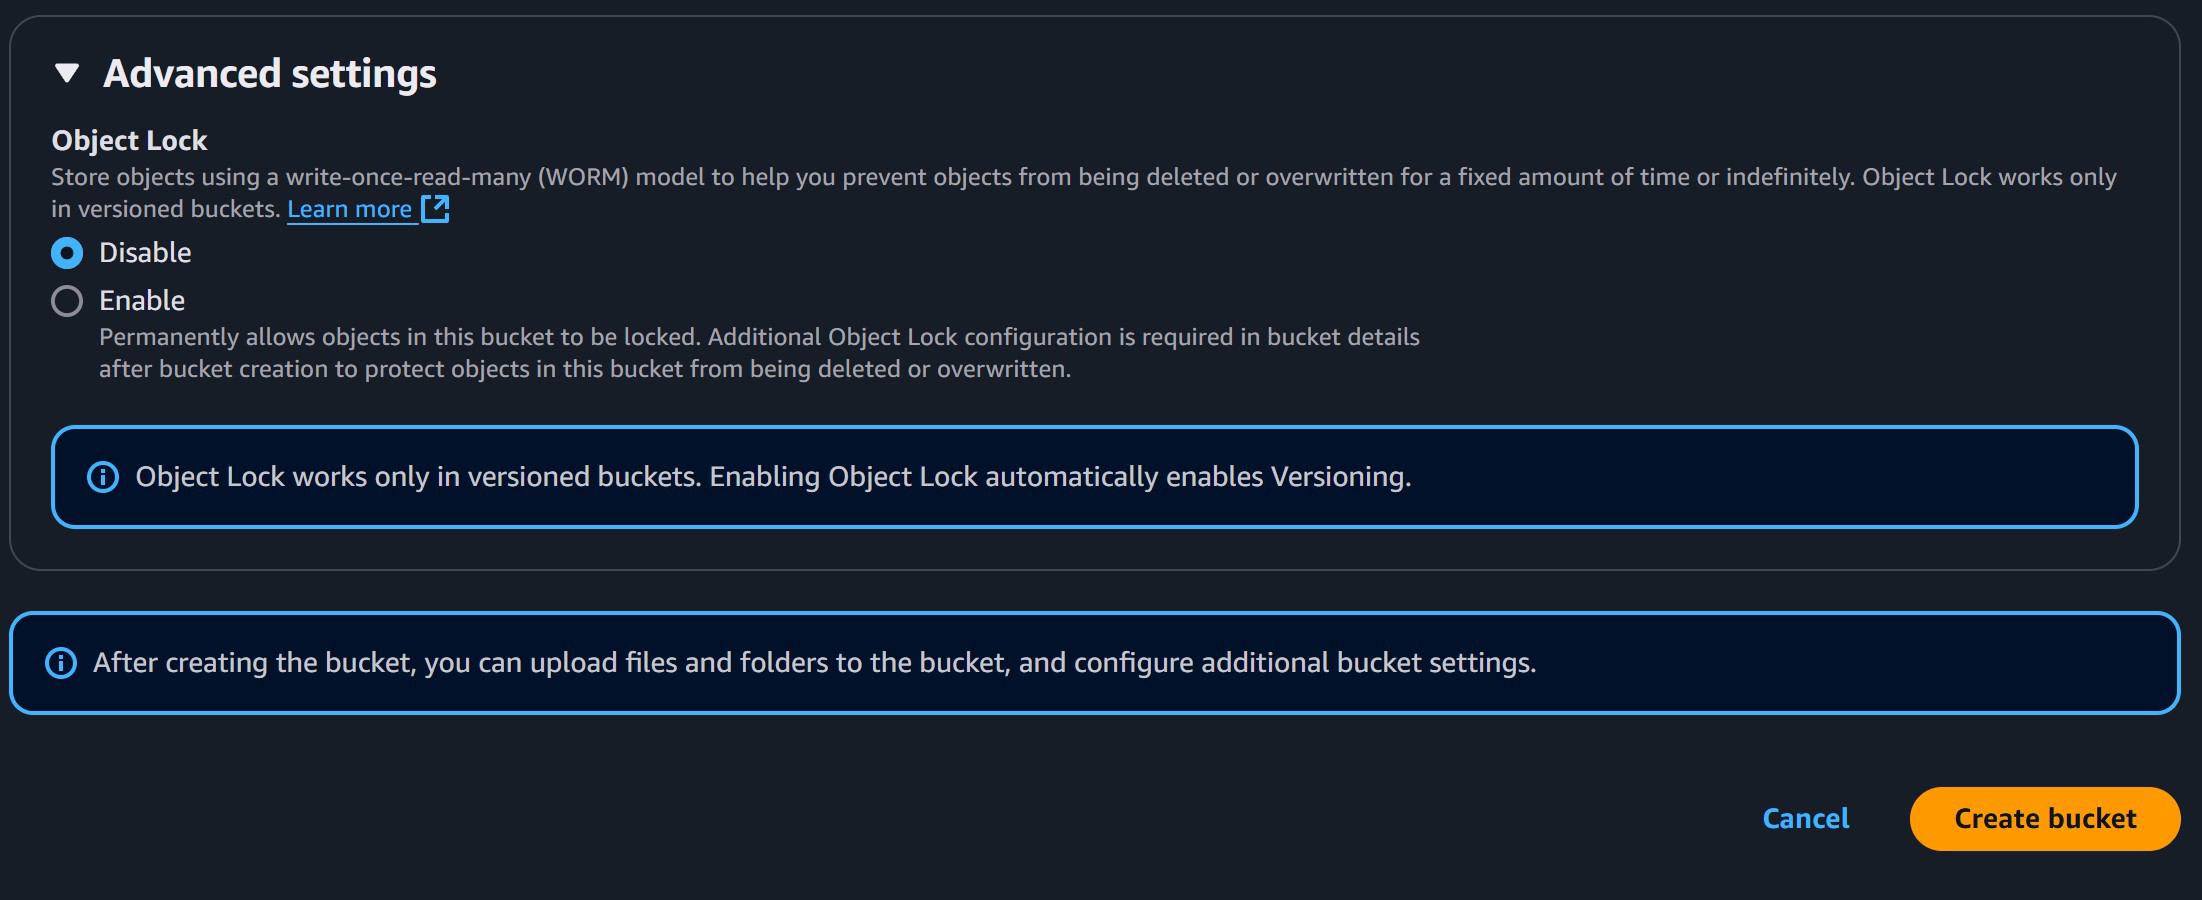
Now copy all the below as it looks on my end
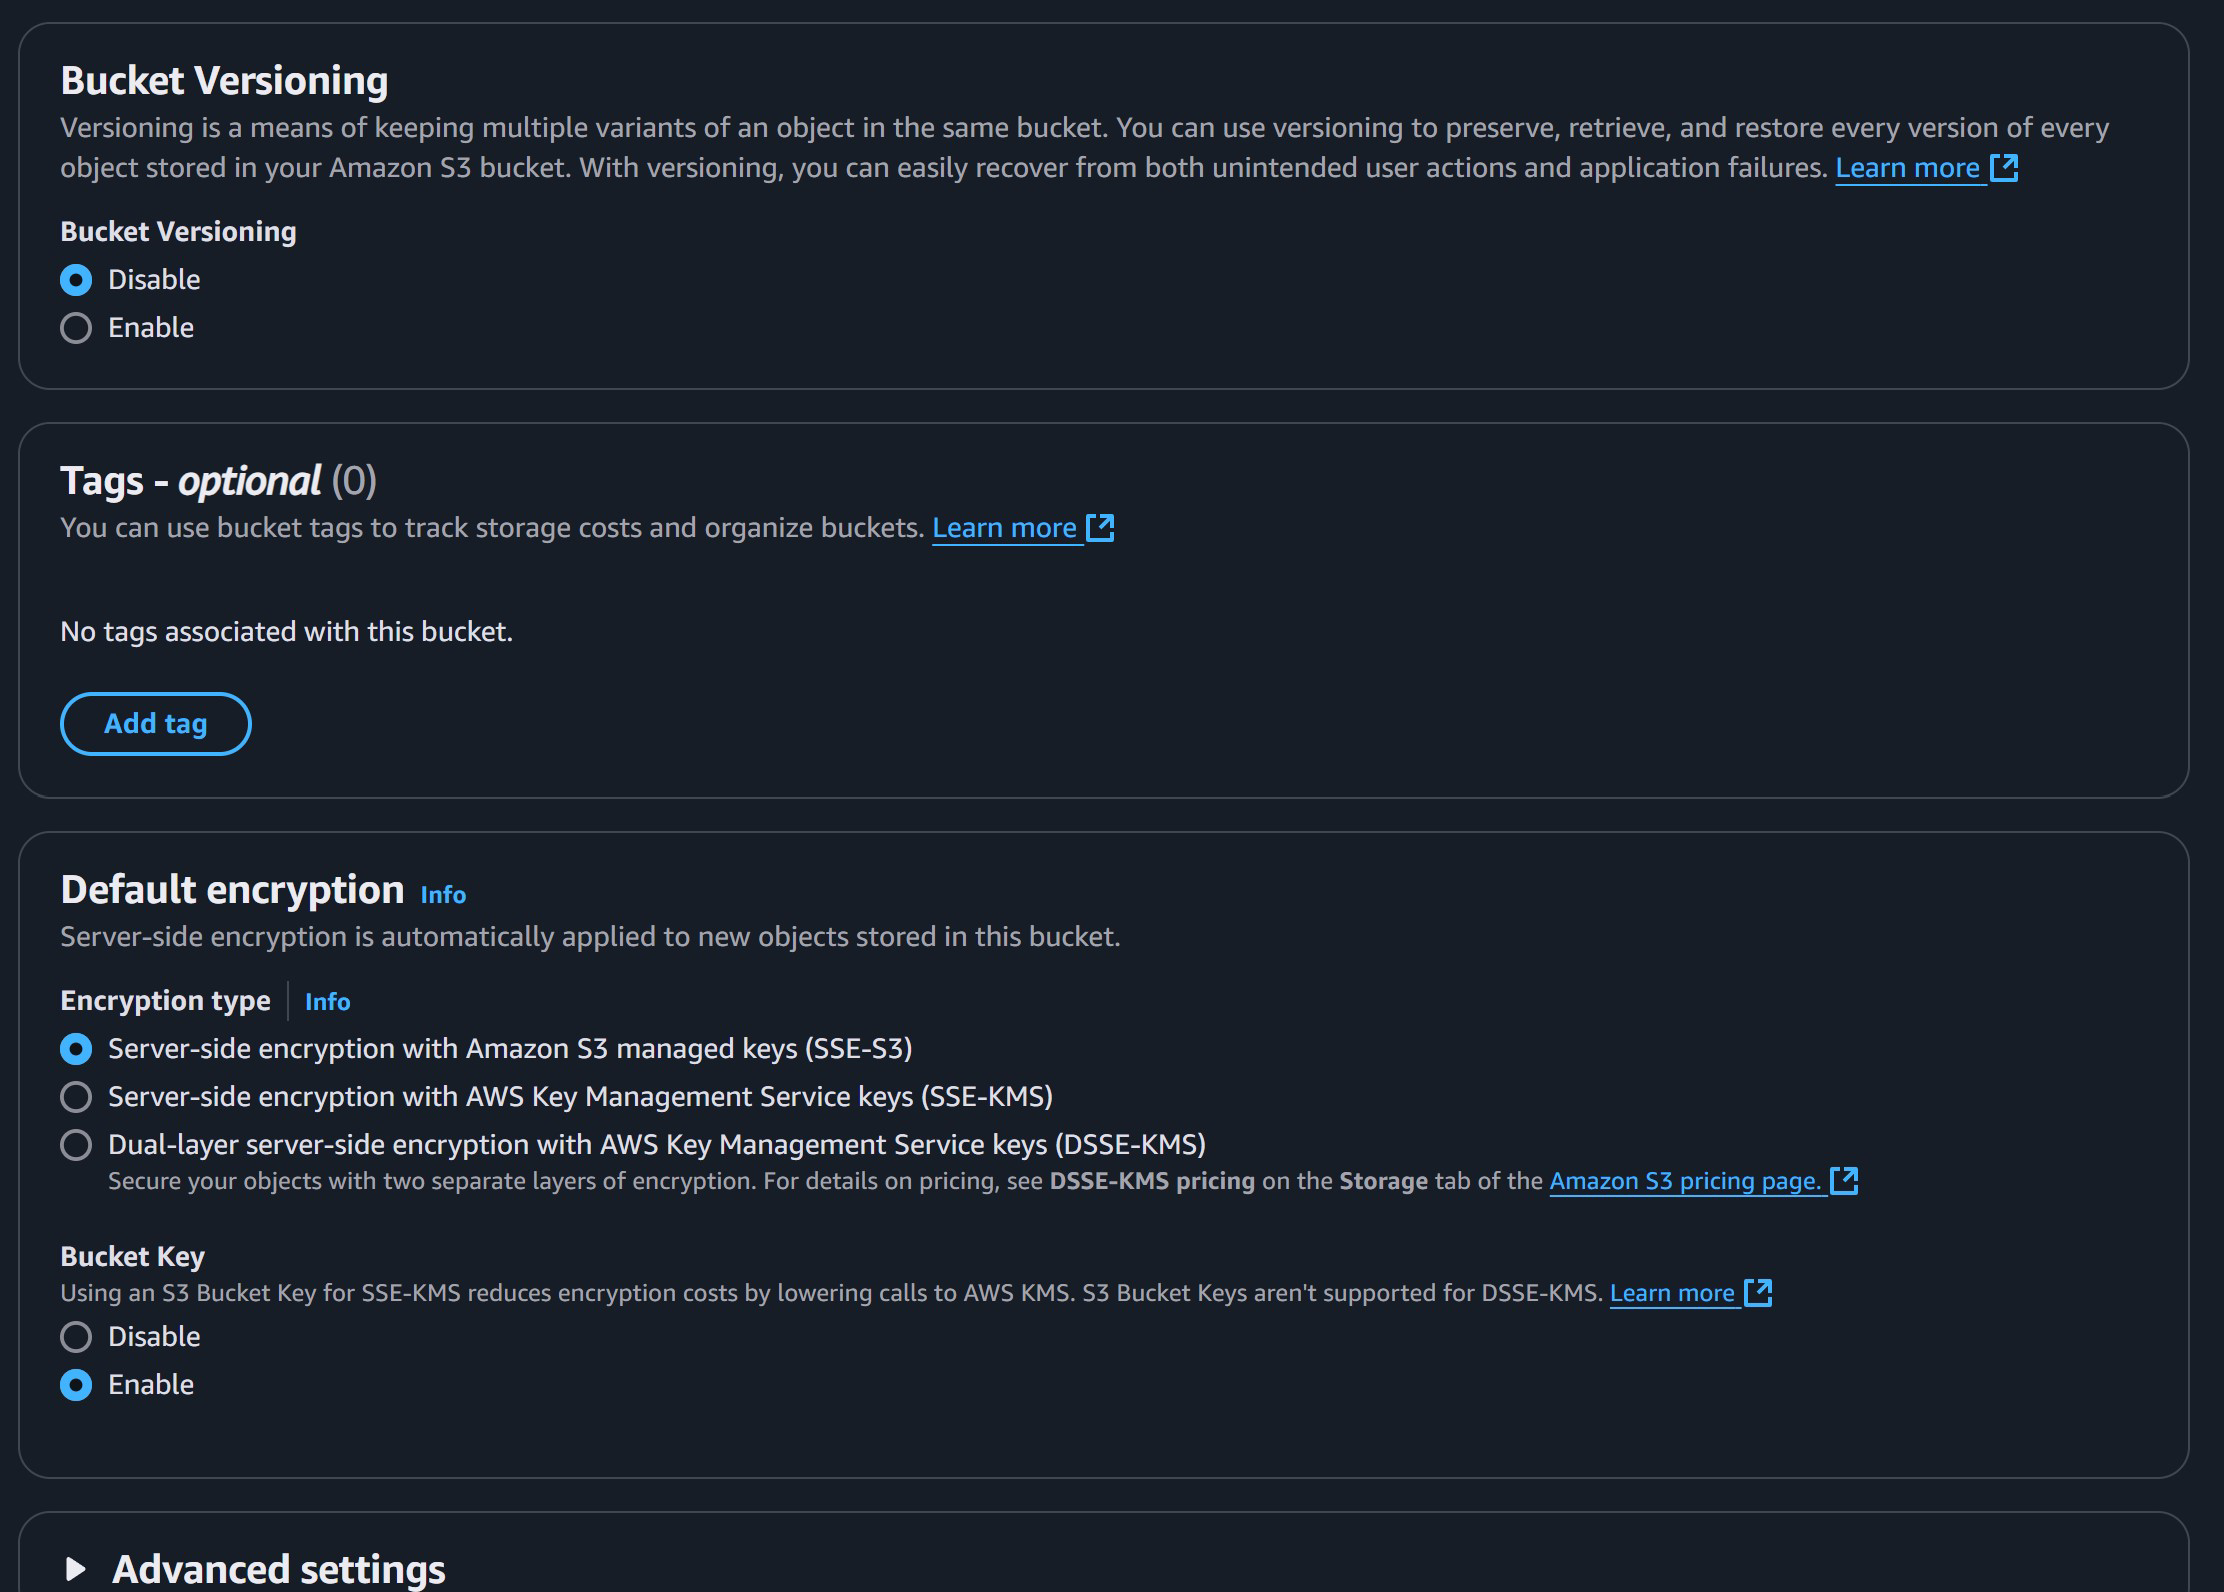
Same stuff here, then hit “Create Bucket”
Bing-bang-bongo, now we’re in business! If you type S3 back on the search bar like we did in the beginning and go to the S3 console we will be able to see our newly created bucket!
Now click on that bucket name and go to “Properties”
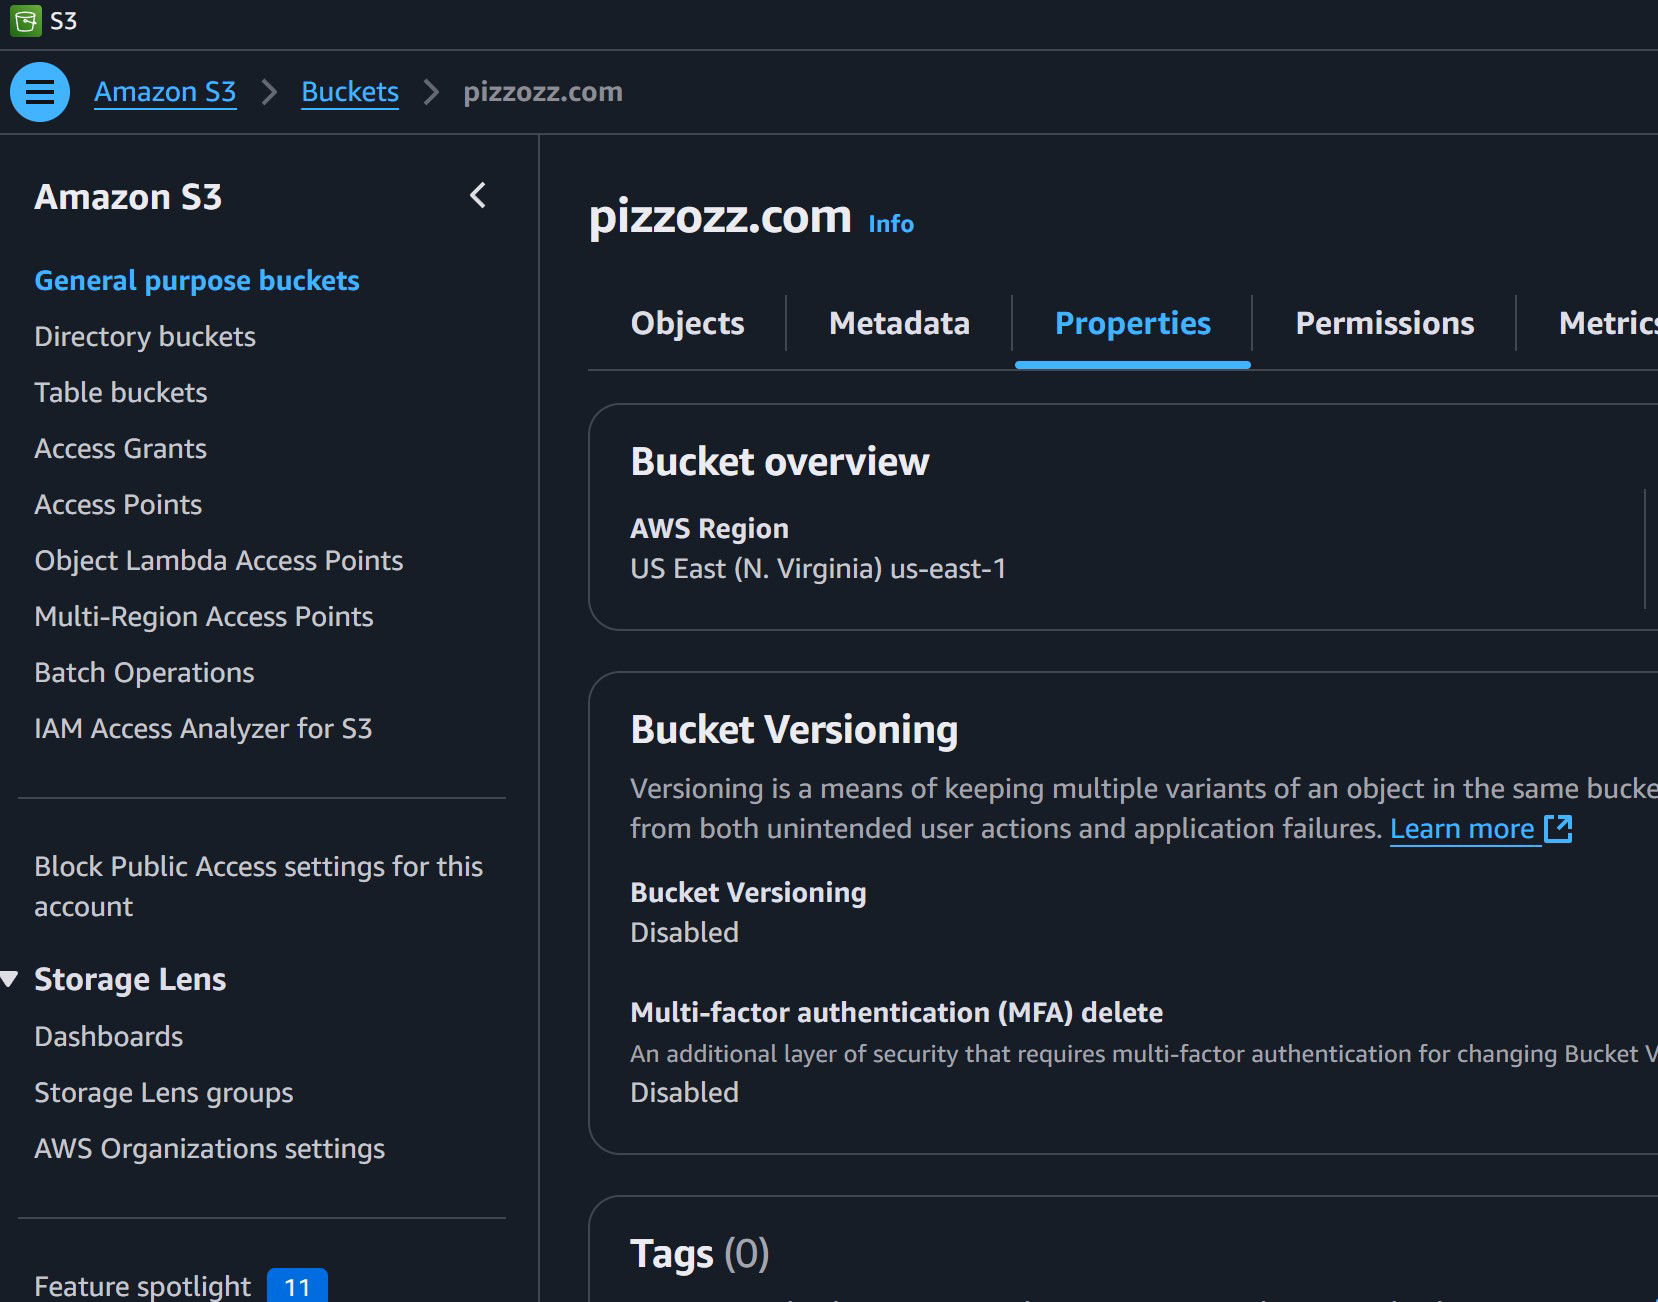
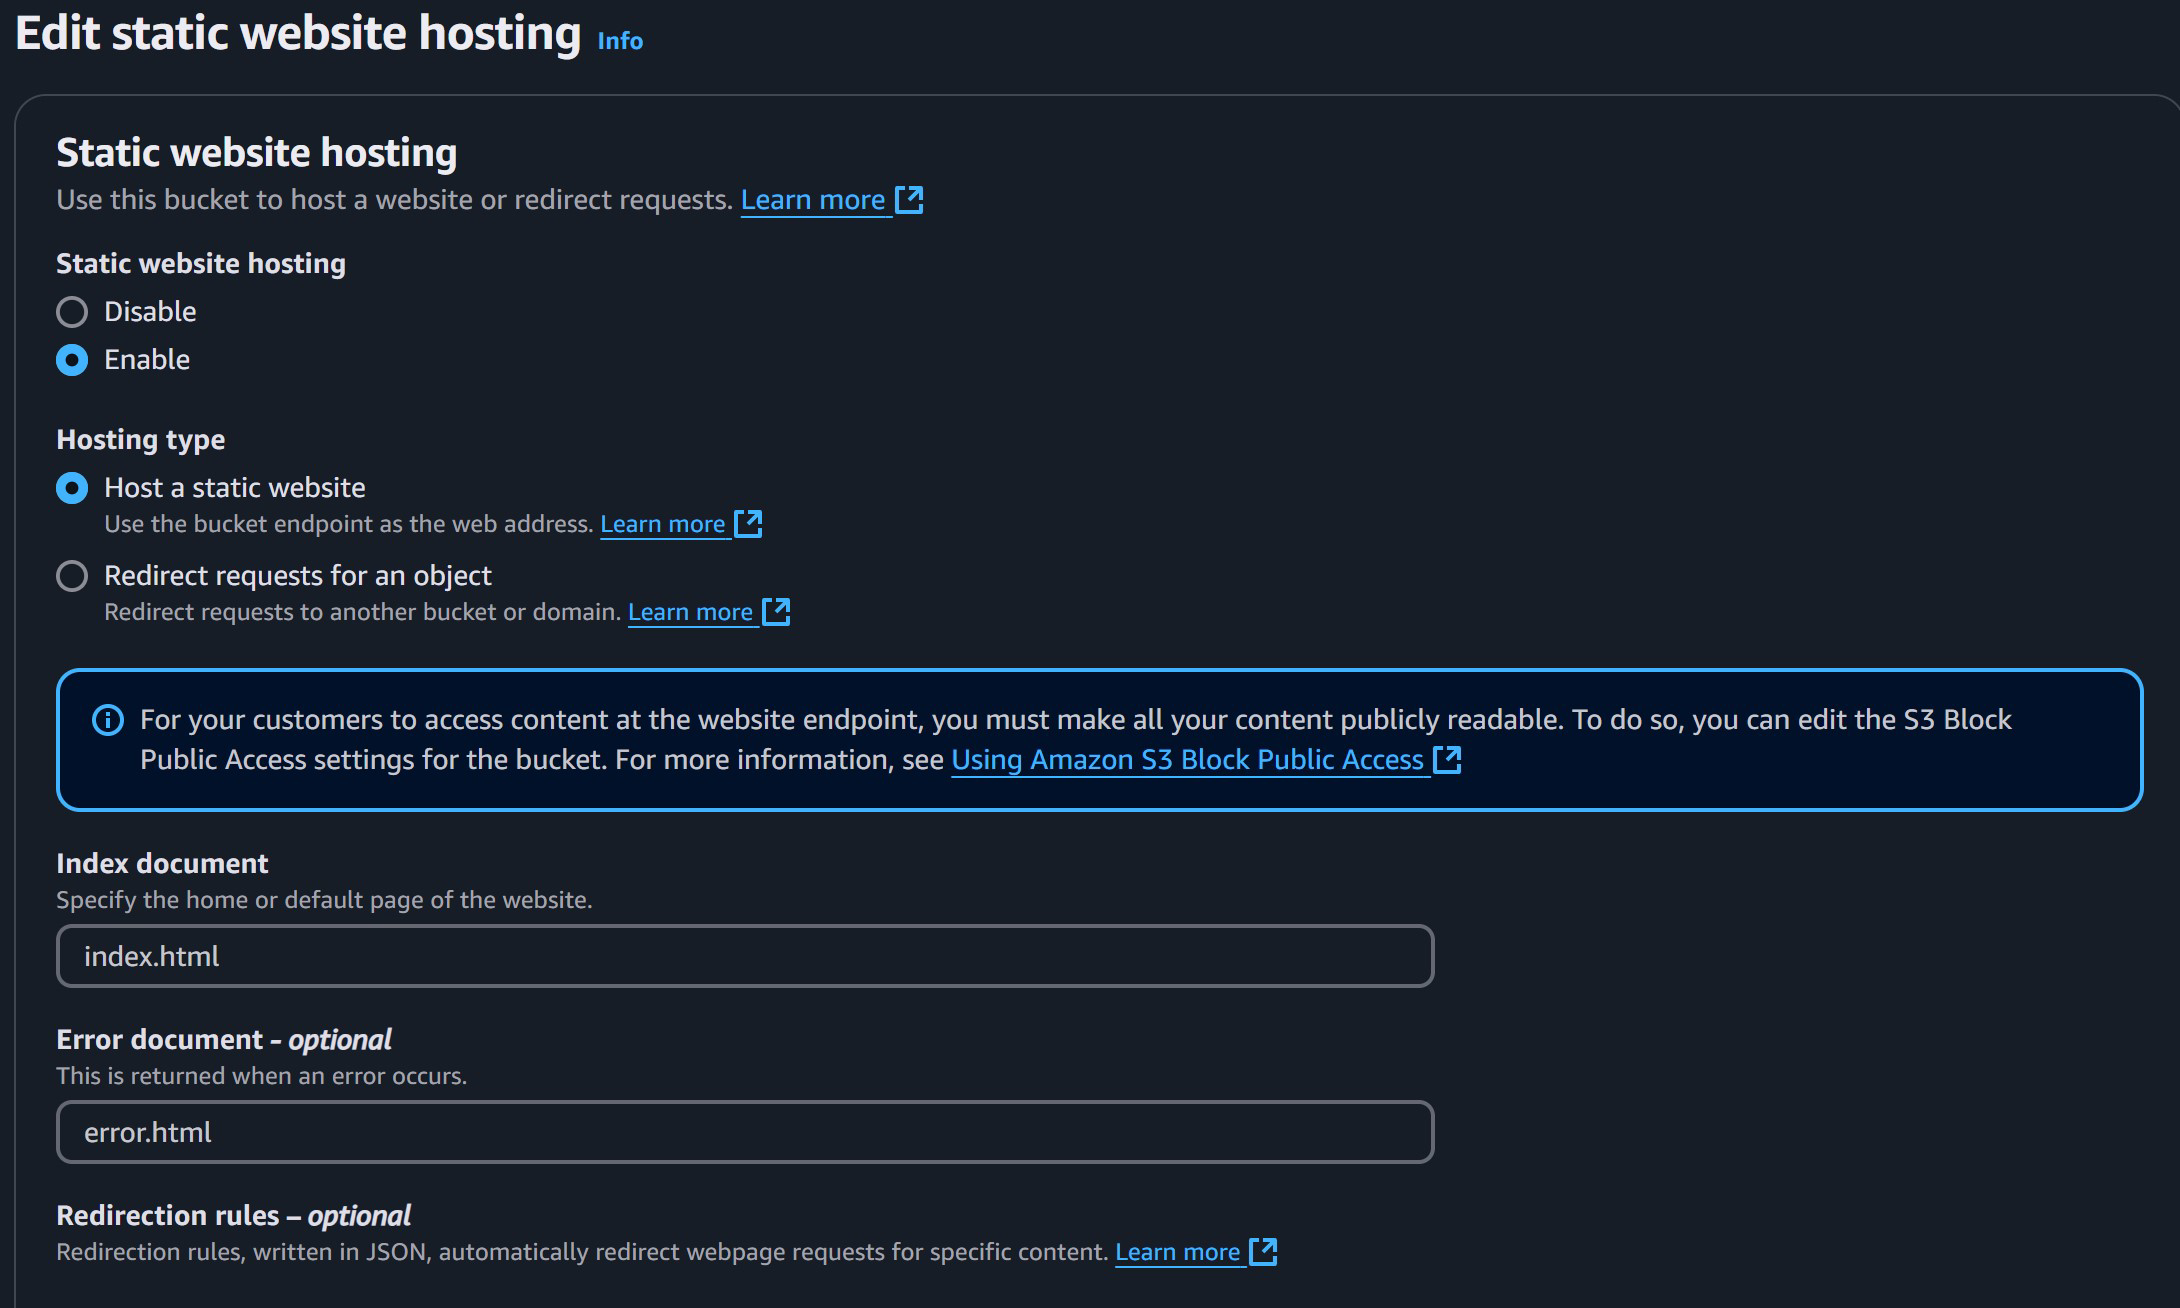
Scroll all the way down until you see “Static website hosting” and click on “Edit”
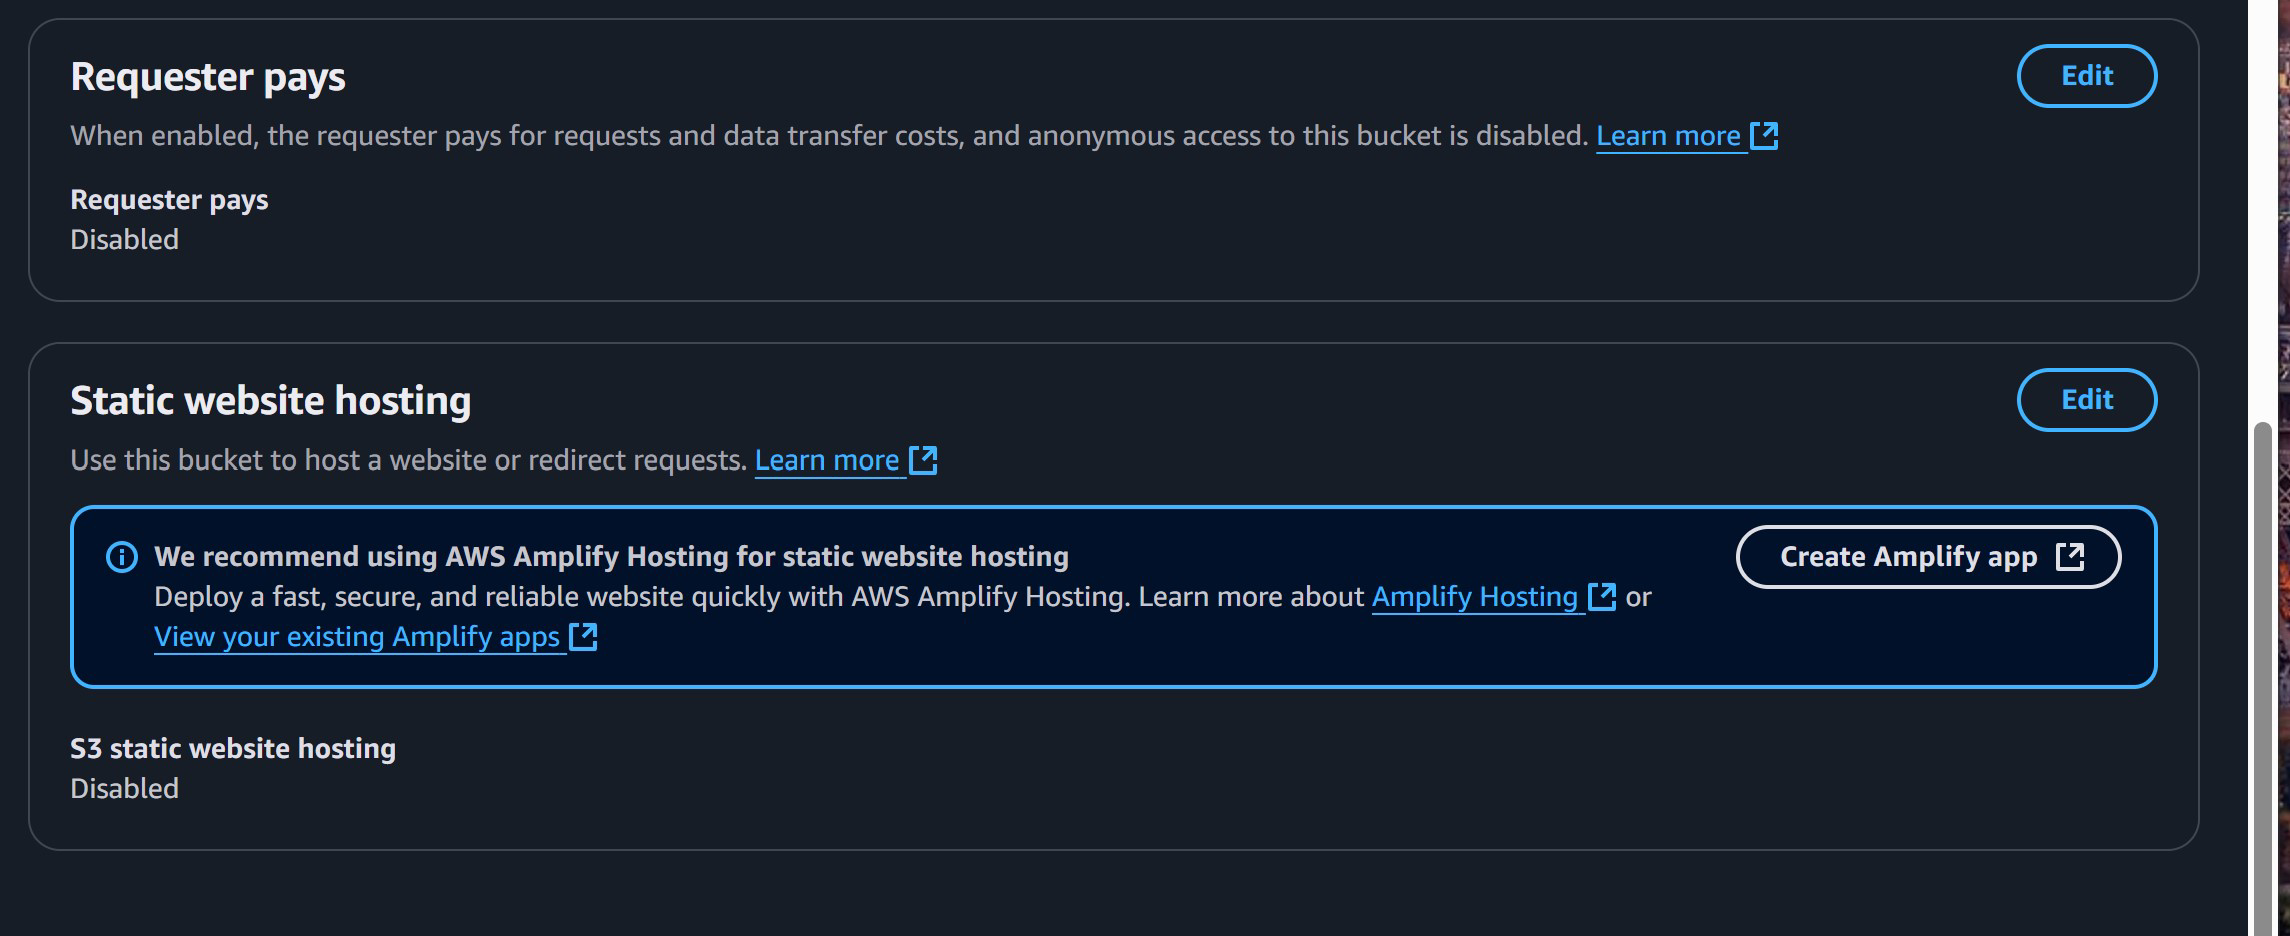
Okay, now just copy my settings below. The “index.html” will be our main website page that the bucket with show when we visit it. Same with “error.html” but you know, when you get an error.
Next we go to “Permissions” for the bucket, copy settings here too
Now we are going to do some HACKERMAN! See the “Edit” button in the “Bucket Policy”? Click it!
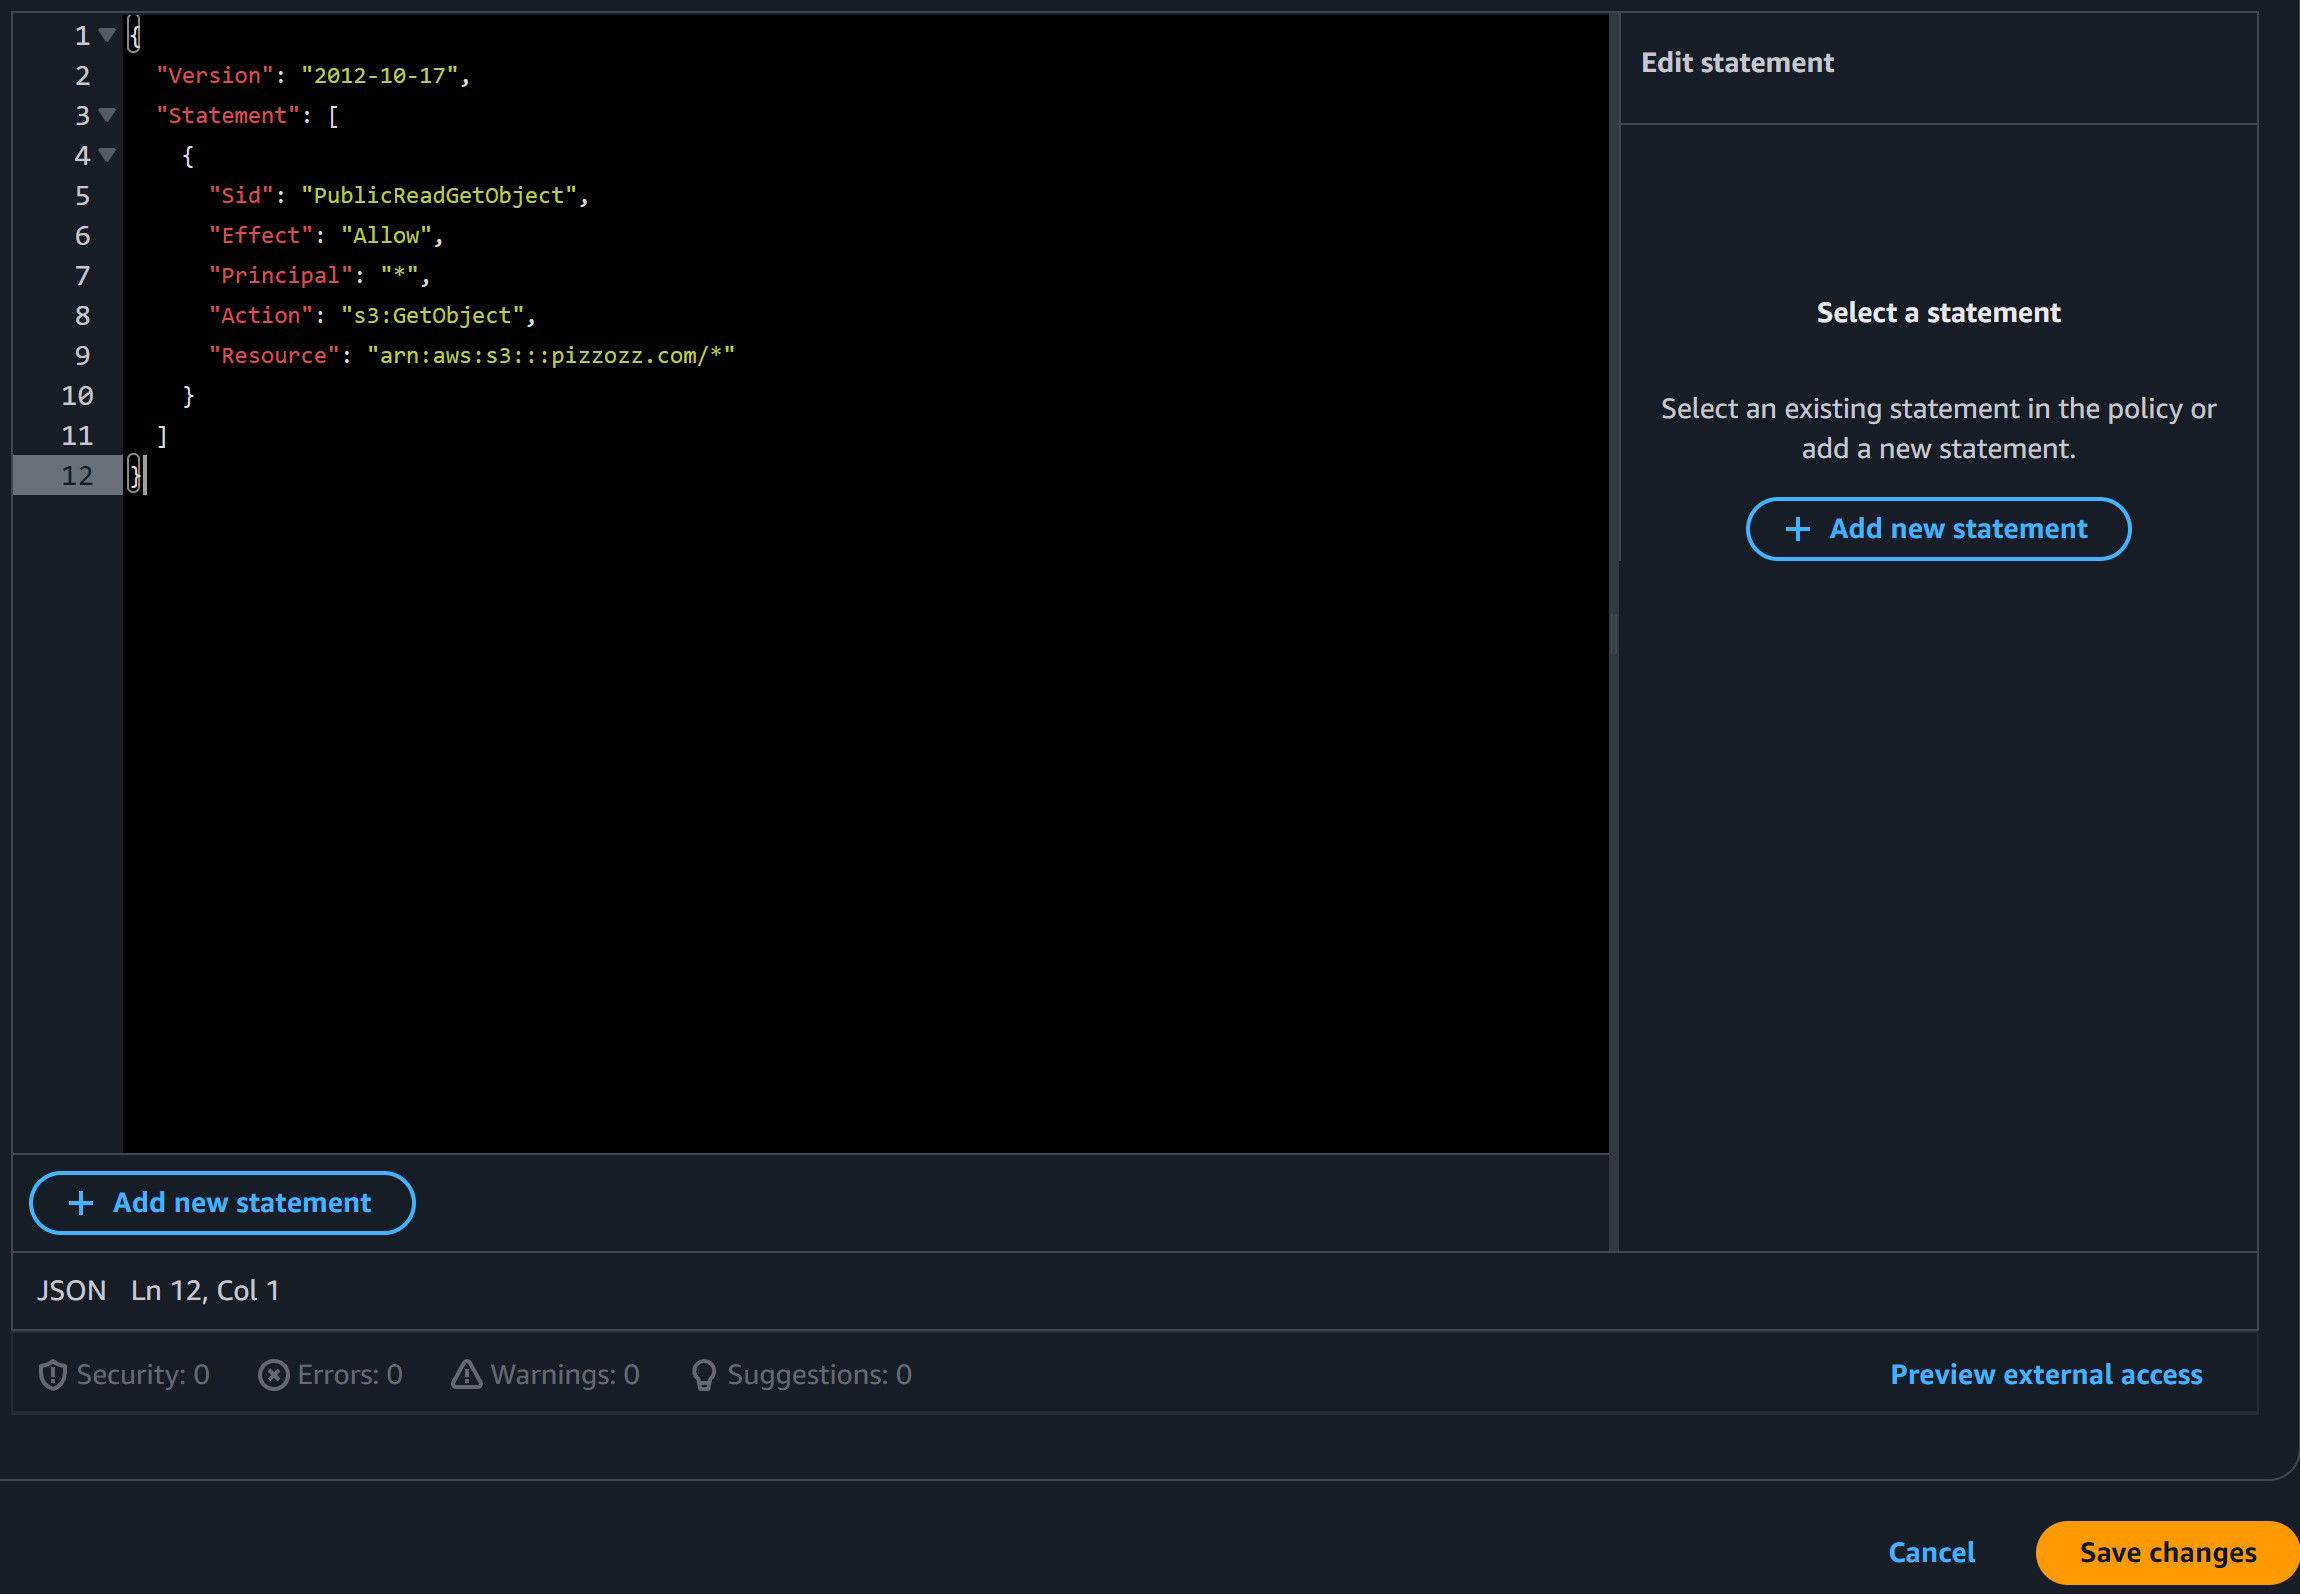
Then copy the hackerman text but instead of pizzozz.com like I have, put your own website!
Ha-ha! Code! Hacker-man you are now!
{
    "Version": "2012-10-17",
    "Statement": [
        {
            "Sid": "PublicReadGetObject",
            "Effect": "Allow",
            "Principal": "*",
            "Action": "s3:GetObject",
            "Resource": "arn:aws:s3:::pizzozz.com/*"
        }
    ]
}
Okay so basically all that does is it’s saying anyone outside can look at any item in your bucket. See the “Resource” bit that says your website? Then that * symbol means they can look at any page that belongs to pizzozz.com. So don’t hide anything in this bucket! Err’one will see it!
Let’s go back to our bucket, it should be empty.
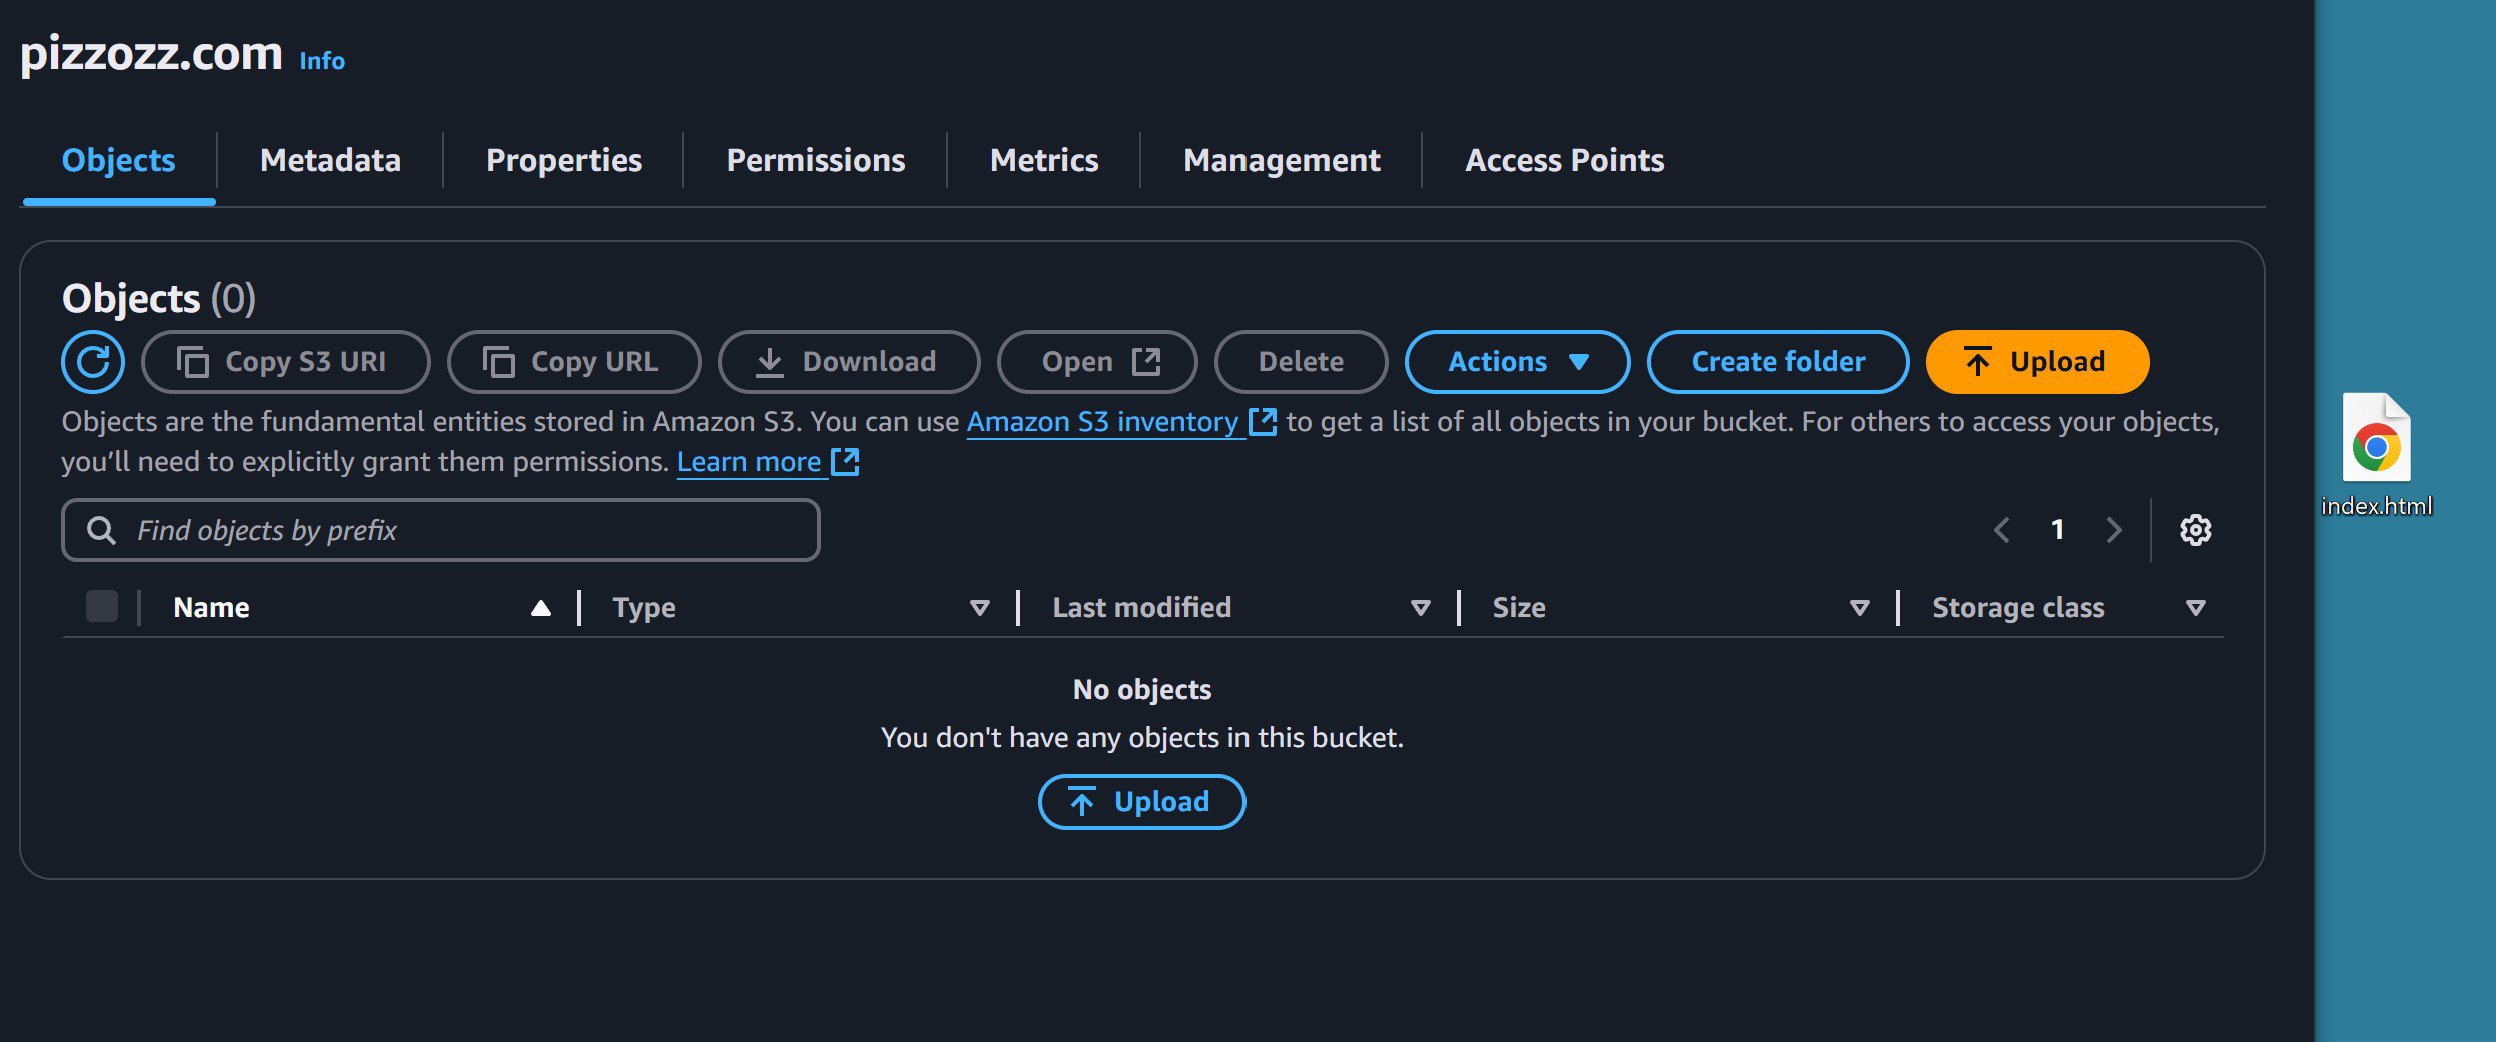
Now comes the cool part! We are going to be creating a file on your desktop (or wherever you want). You can create it as a .txt file and then just change the extension to .html. An html file is basically just a text file. Open it up on your favorite editor and write some memorable one-liner
Click that file and drag it over to the center to queue it to be uploaded in the bucket, then click “Upload”
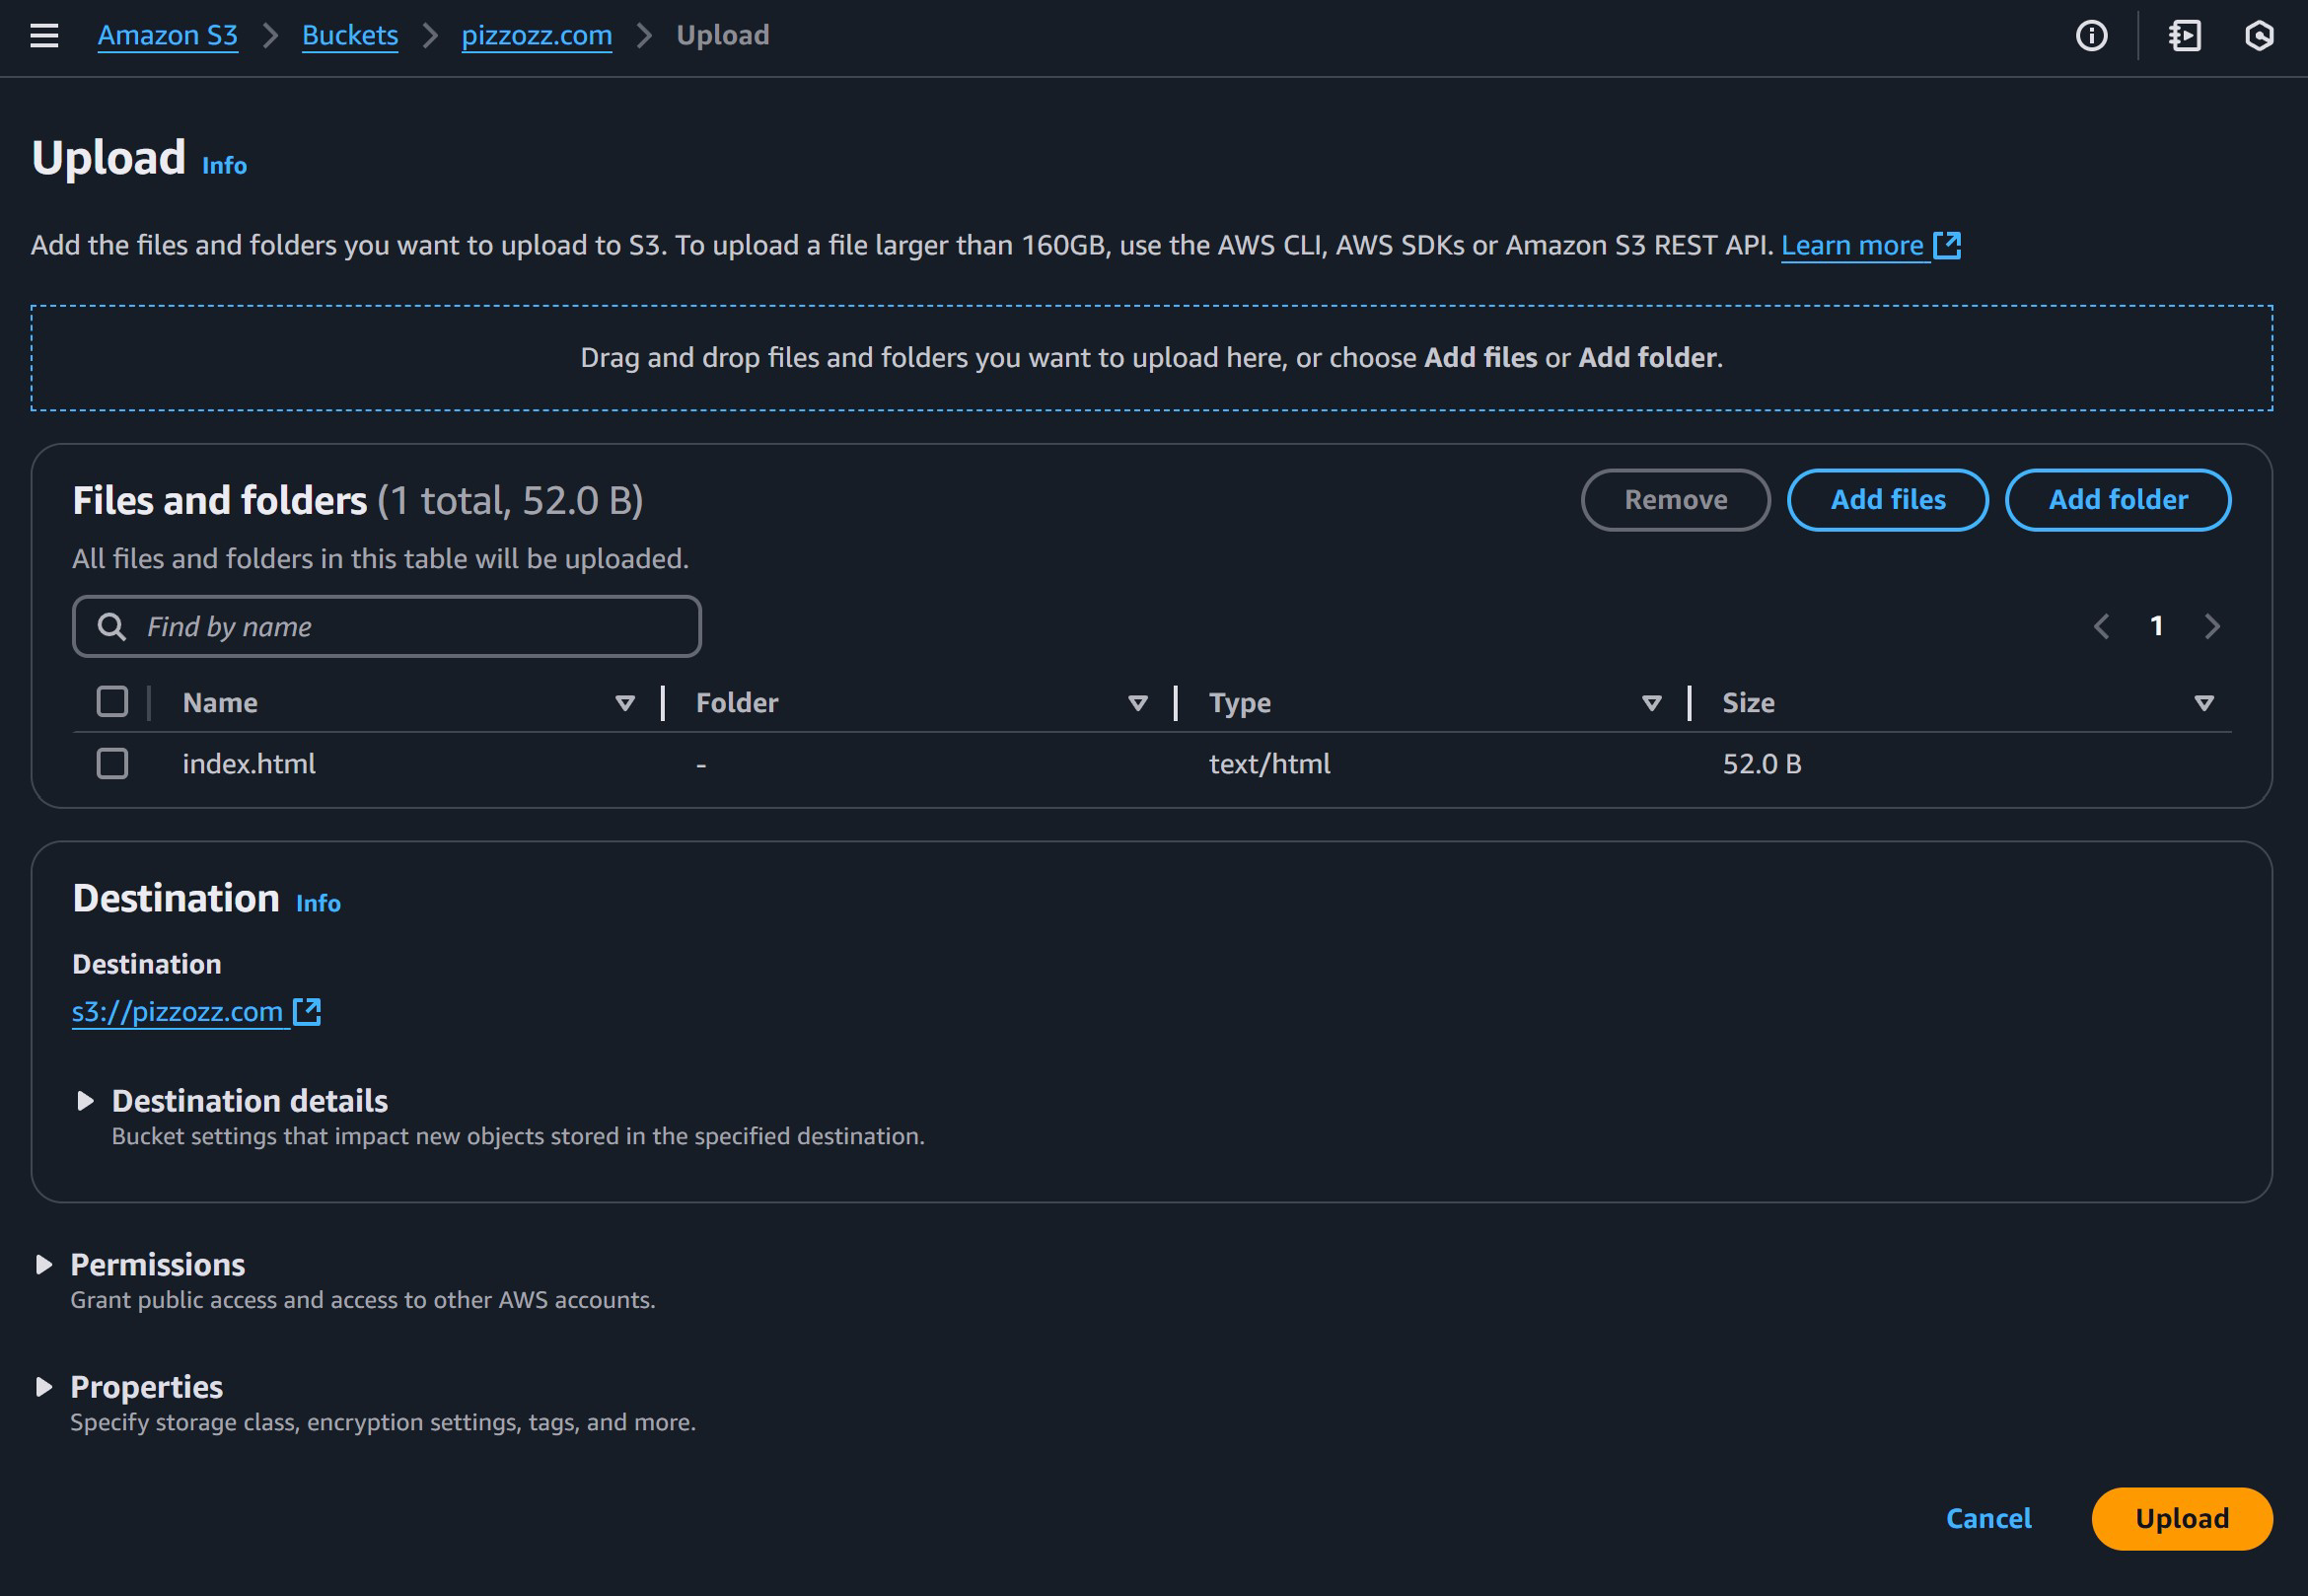
Now your file is in the bucket. So what does that mean? Well, we uploaded a file to a bucket that we made public where everyone can see the stuff in the bucket. Our public bucket name will be our “website” in my case pizzozz.com followed by s3-website-us-east-1.amazonaws.com/ ff
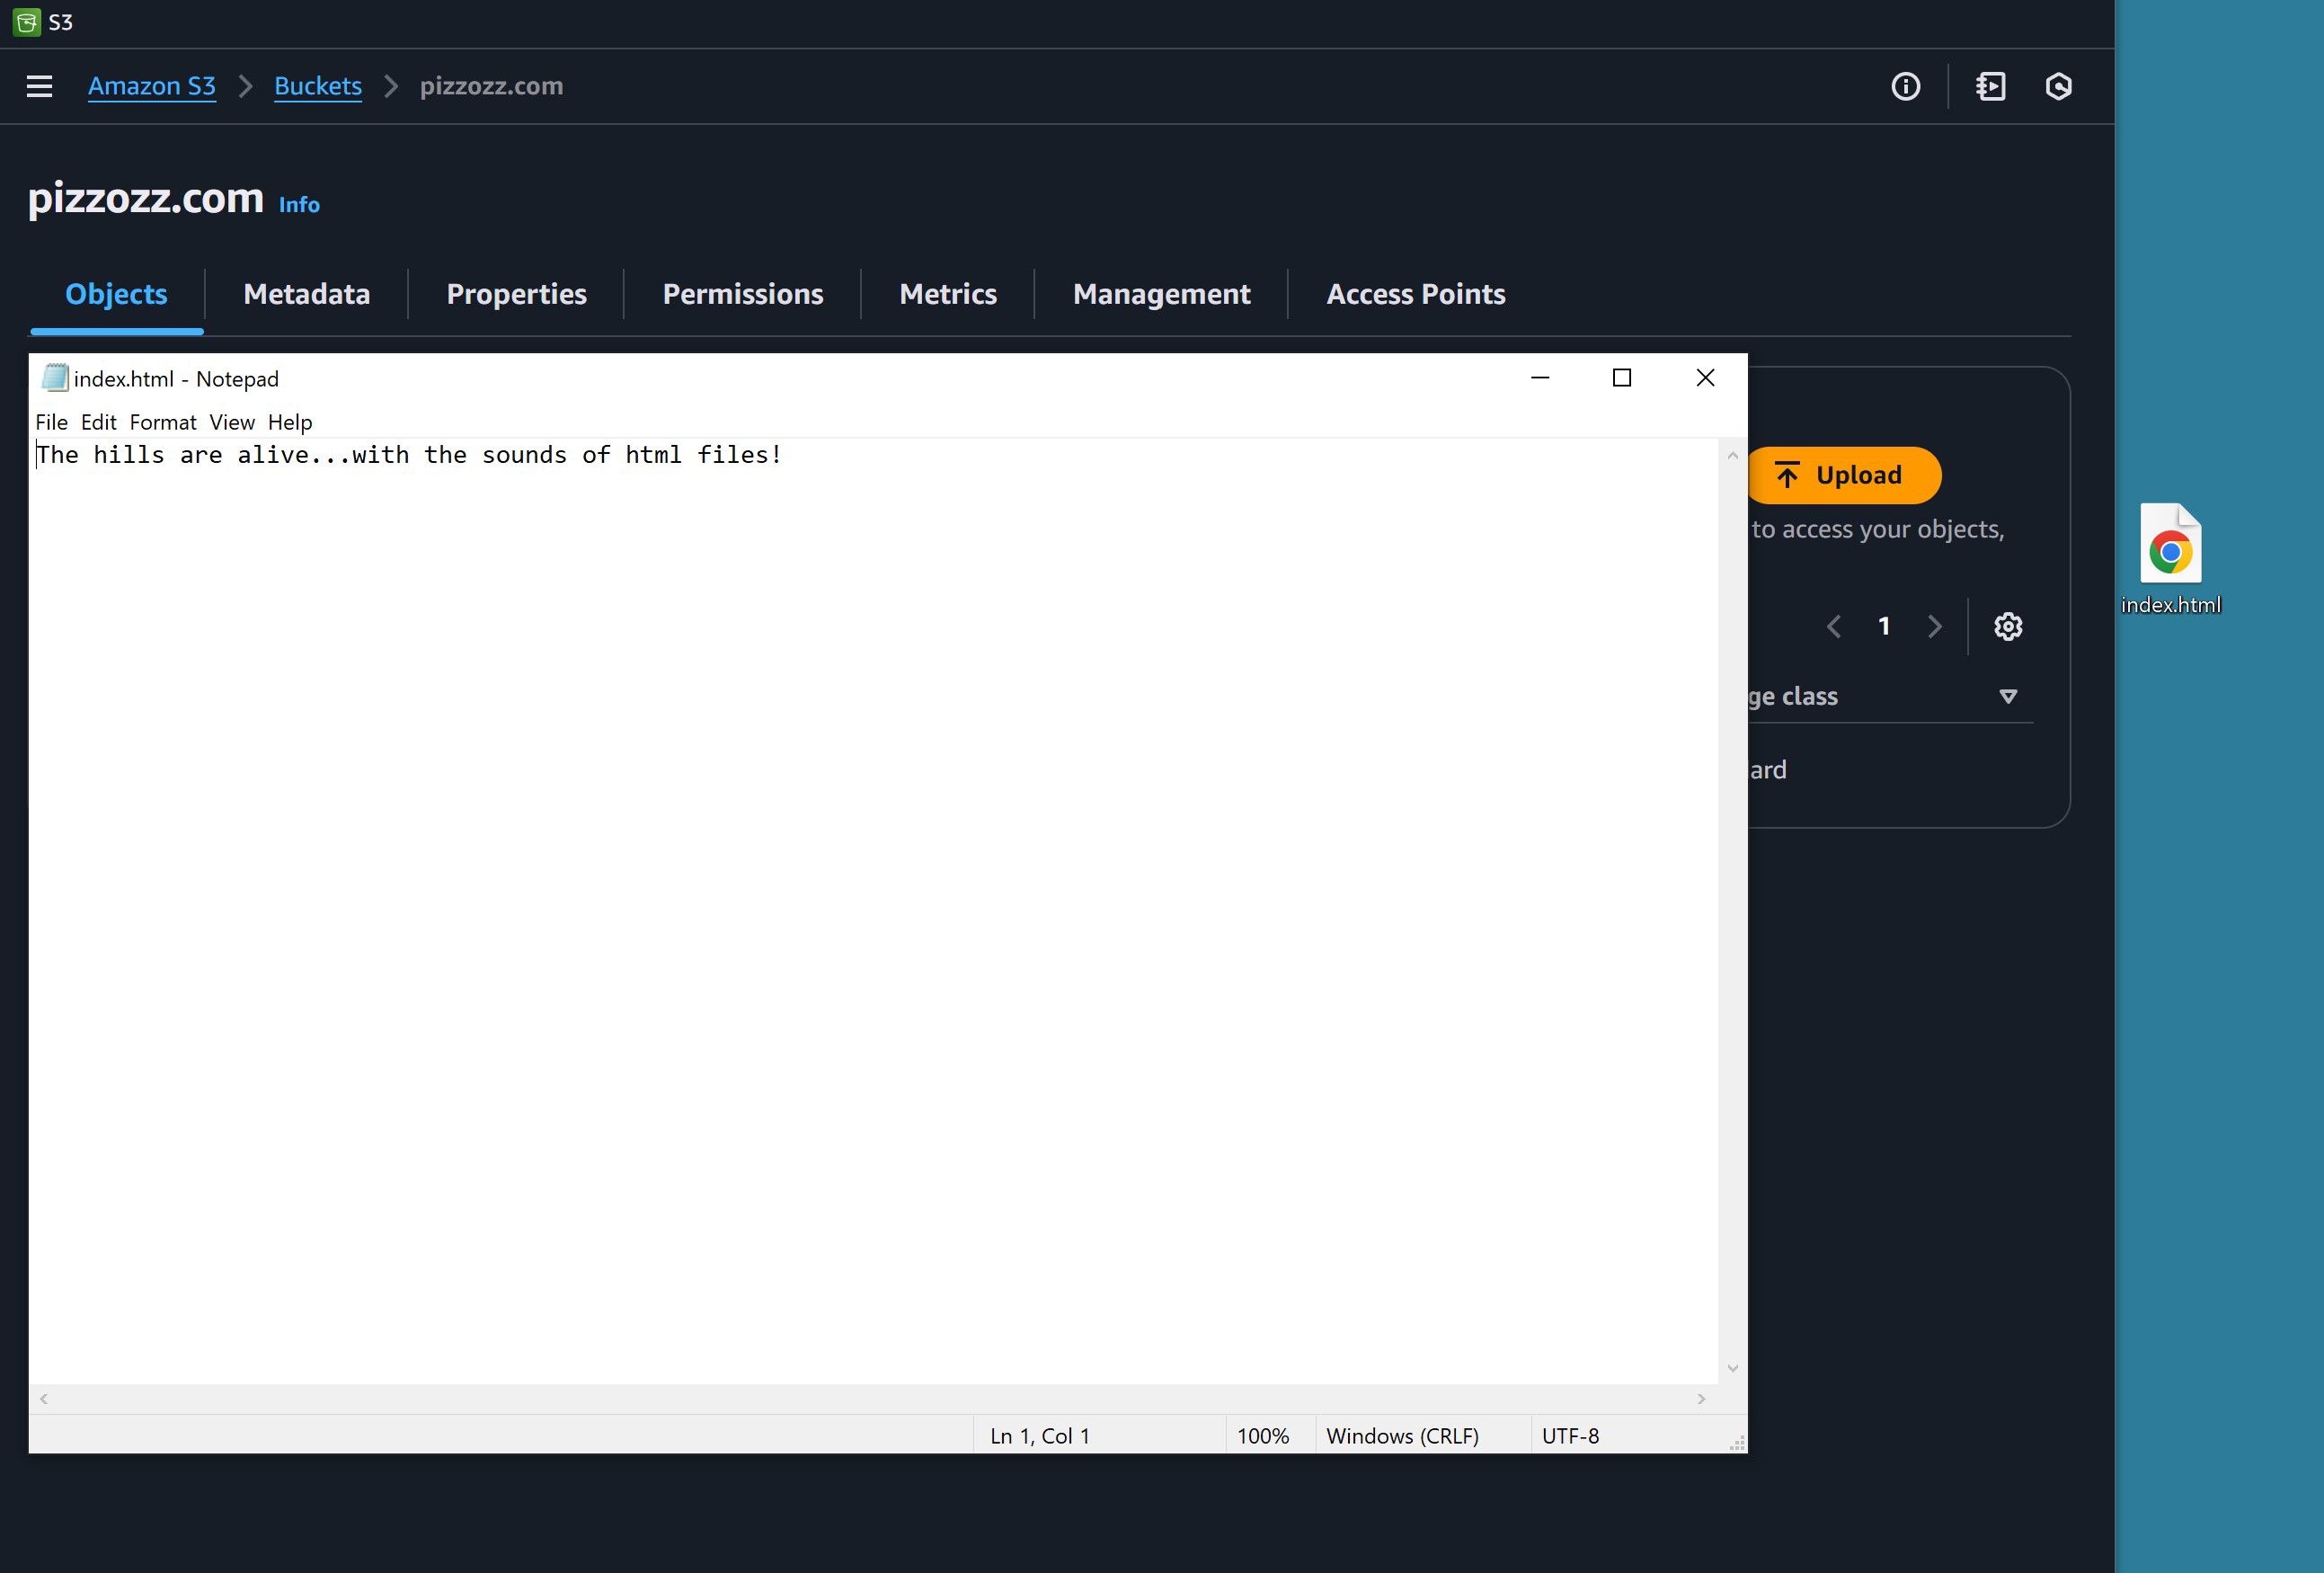
So if I go to
http://pizzozz.com.s3-website-us-east-1.amazonaws.com/ or you go to your own version we should see the “index.html” we just uploaded. Neat!
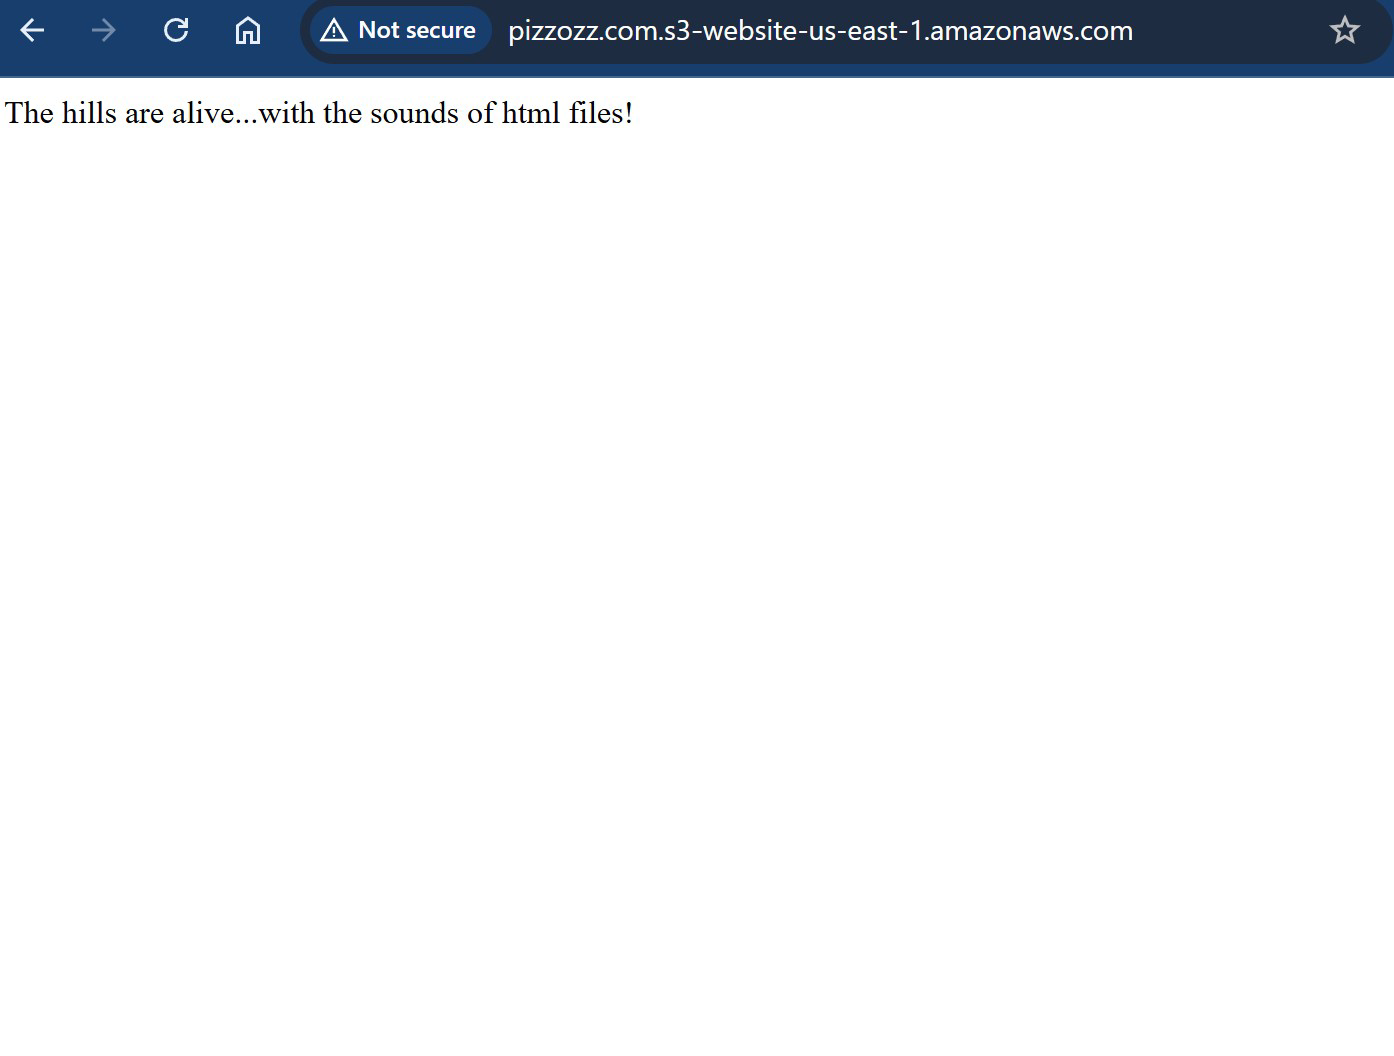
You may see on your browser that is says “Not Secure” That’s because we are using HTTP instead of “HTTP-Secure.” Browsers now automatically warn you when that happens because other hacker-person might spy on your website. We will fix this later. Just don’t put personal stuff in the bucket!
We can add all sorts of things to this bucket and people can take a look at it anywhere on the internet. Try creating another html page, name it whatever you want: “fany-dancy.html” and add some text inside then upload to the bucket again, same where you had index.html.
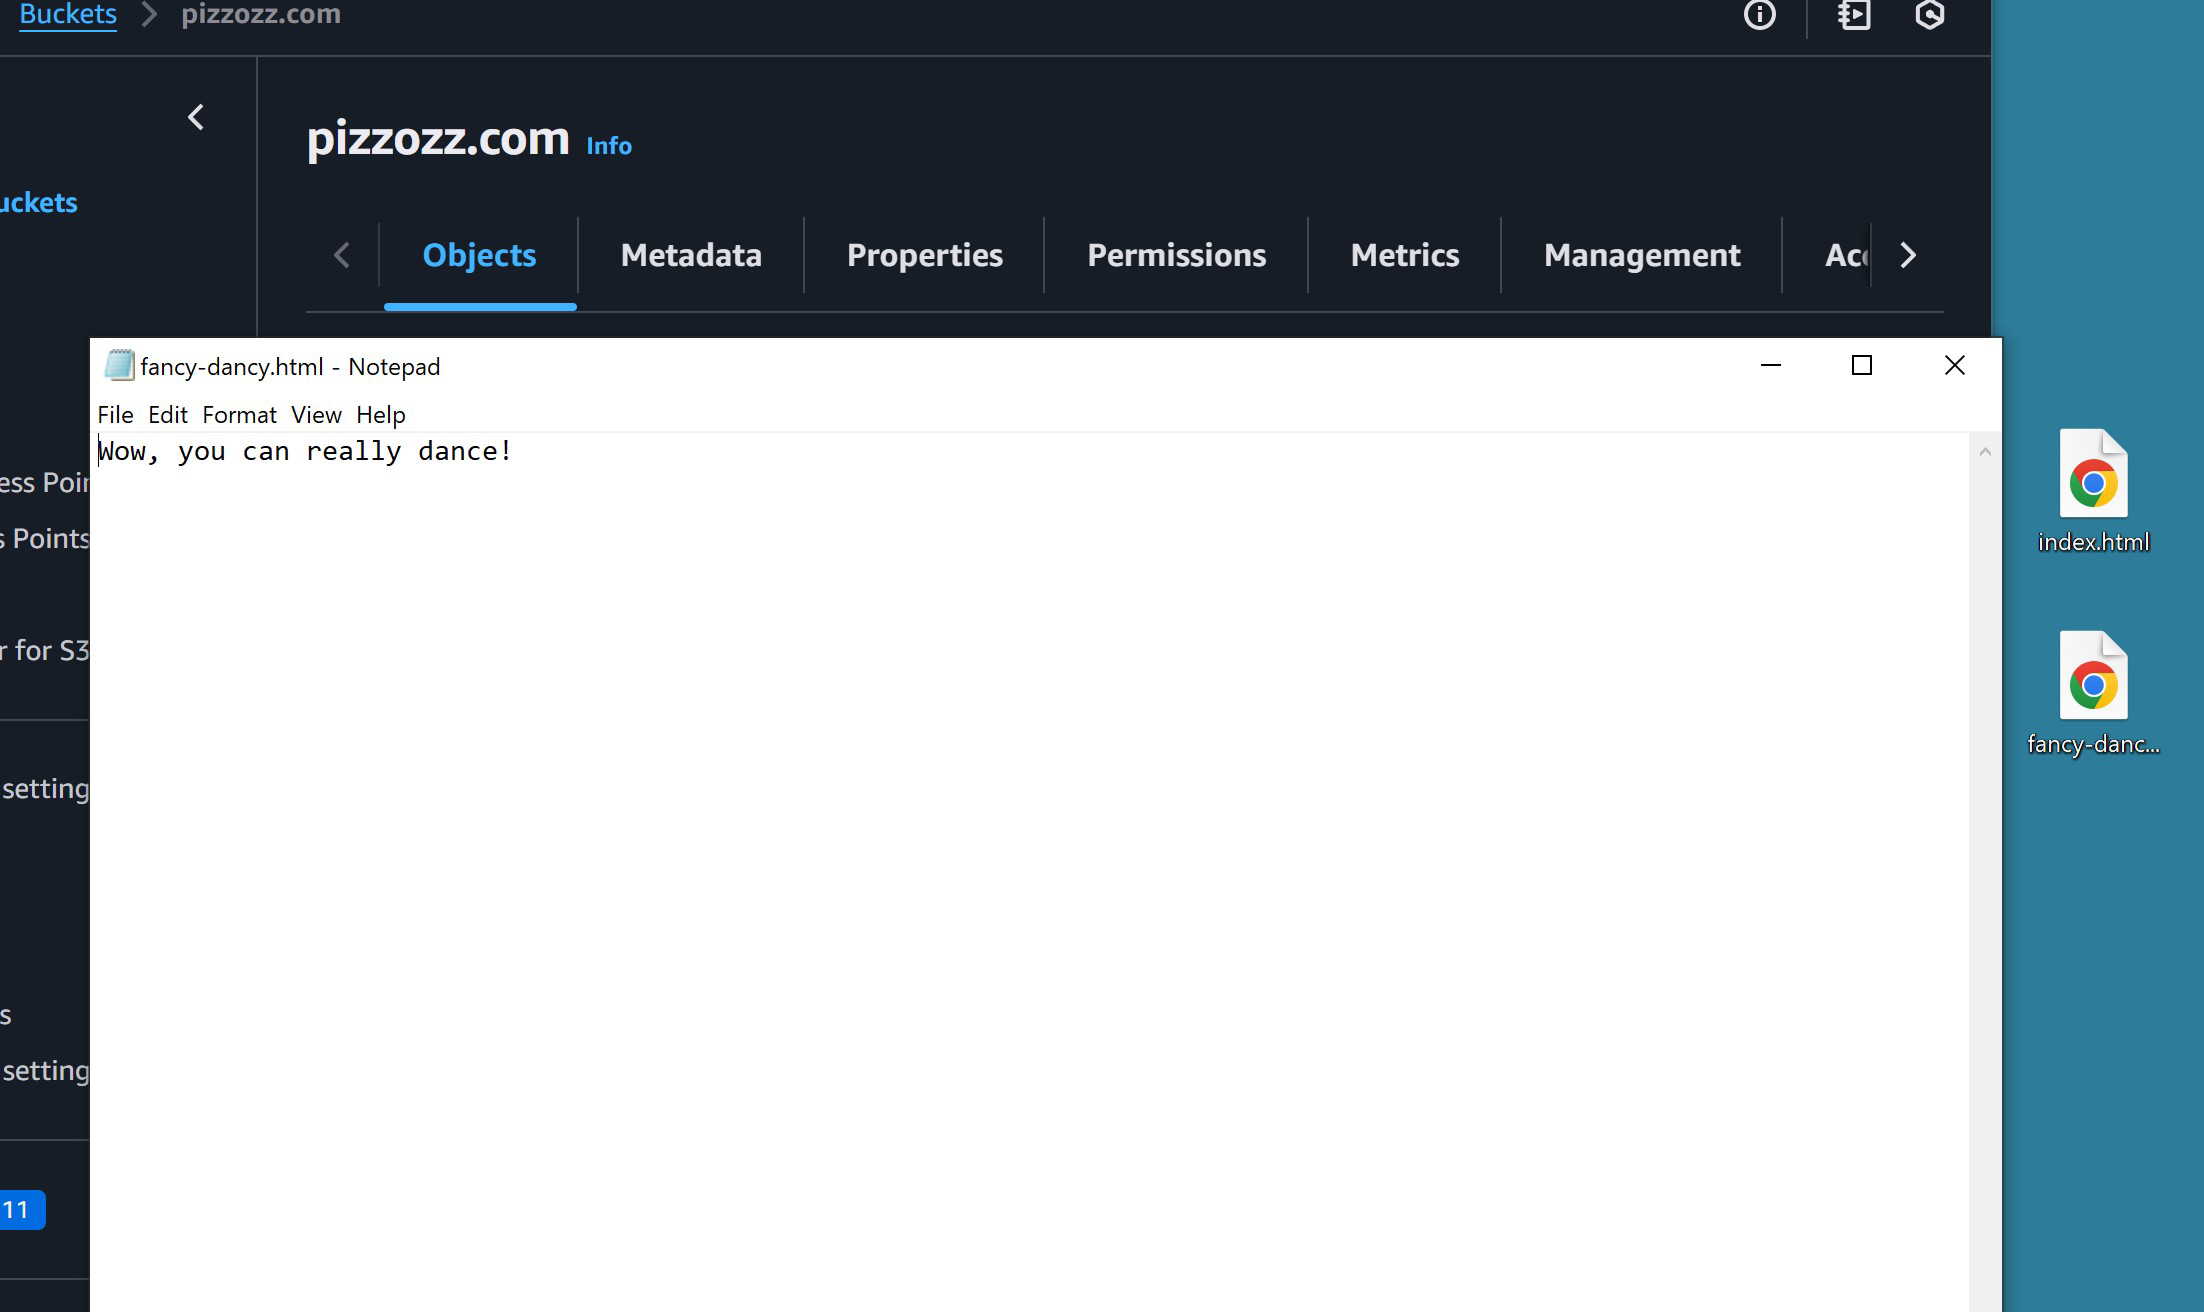
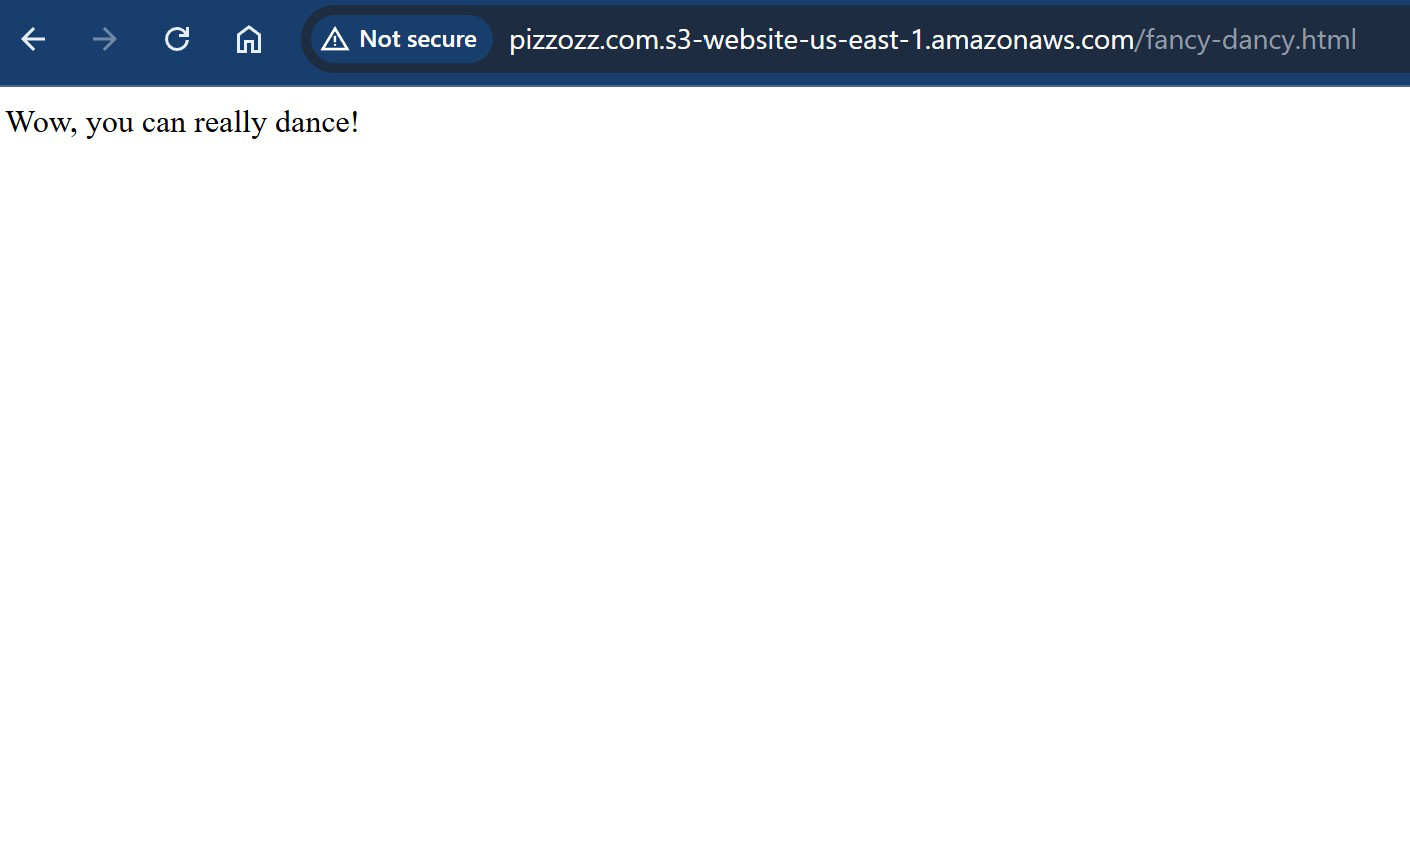
Then we go visit our bucket but then specify the new file we uploaded
http://pizzozz.com.s3-website-us-east-1.amazonaws.com/fancy-dancy.html we can see that too!
You can store whatever you want in your bucket not just HTML files; and anyone around the world can download them from you!
Ah! But now you are saying, “Hey internet-stranger! I want to go to my own website, not some bucket website!”
Well do I have the deal for you! Let’s make sure our domain is connected to our bucket www.pizzozz.com/make-a-websites/connectingbucket/